
“The truth often lies beneath the surface and is not revealed until you scrape away the layers.” As work progressed on one of our project cars, we realized no truer words had ever been spoken.
We chose to remove the old paint chemically, as rust was minimal and we did not want to risk warping the sheet metal body panels by media blasting them. There were few surprises—that is until we reached the passenger side door. Beneath the paint, we soon revealed layers of body filler and lead, not to mention numerous holes left from earlier bodywork and dent repair.
A quick assessment told us that in order to make a quality repair, the door skin needed to come off. We considered removing, straightening, and replacing the existing skin, fabricating a new skin, or trying to locate a vintage replacement door skin. Internet searches led us to American Muscle Car’s eBay store, which features thousands of replacement sheet metal options for most US makes and models, including one for our car.

1. Determining the Extent of the Damage
After chemically removing numerous layers of paint and body filler, we were left with the bare skin. The evidence was clear that at some time (or two) the door had been side swiped. The inner door structure was pushed back and holes remained in both the door skin and along the bottom edge of the inner door. These holes were used to pry and pull the old door skin close to its original position before applying a heavy layer of body filler. Because the holes were not welded closed, the body filler would have failed in time as moisture penetrated.
2. Locating New Door Skins
Door skins are readily available for most popular makes and models, but for the rest of us it takes a little more hunting. One excellent resource for vintage door skins and body and patch panels is American Muscle Car in Arcanum, OH. They have over 15,000 vintage body panels in stock for most years, makes, and models, including a right front door for a ’57 DeSoto.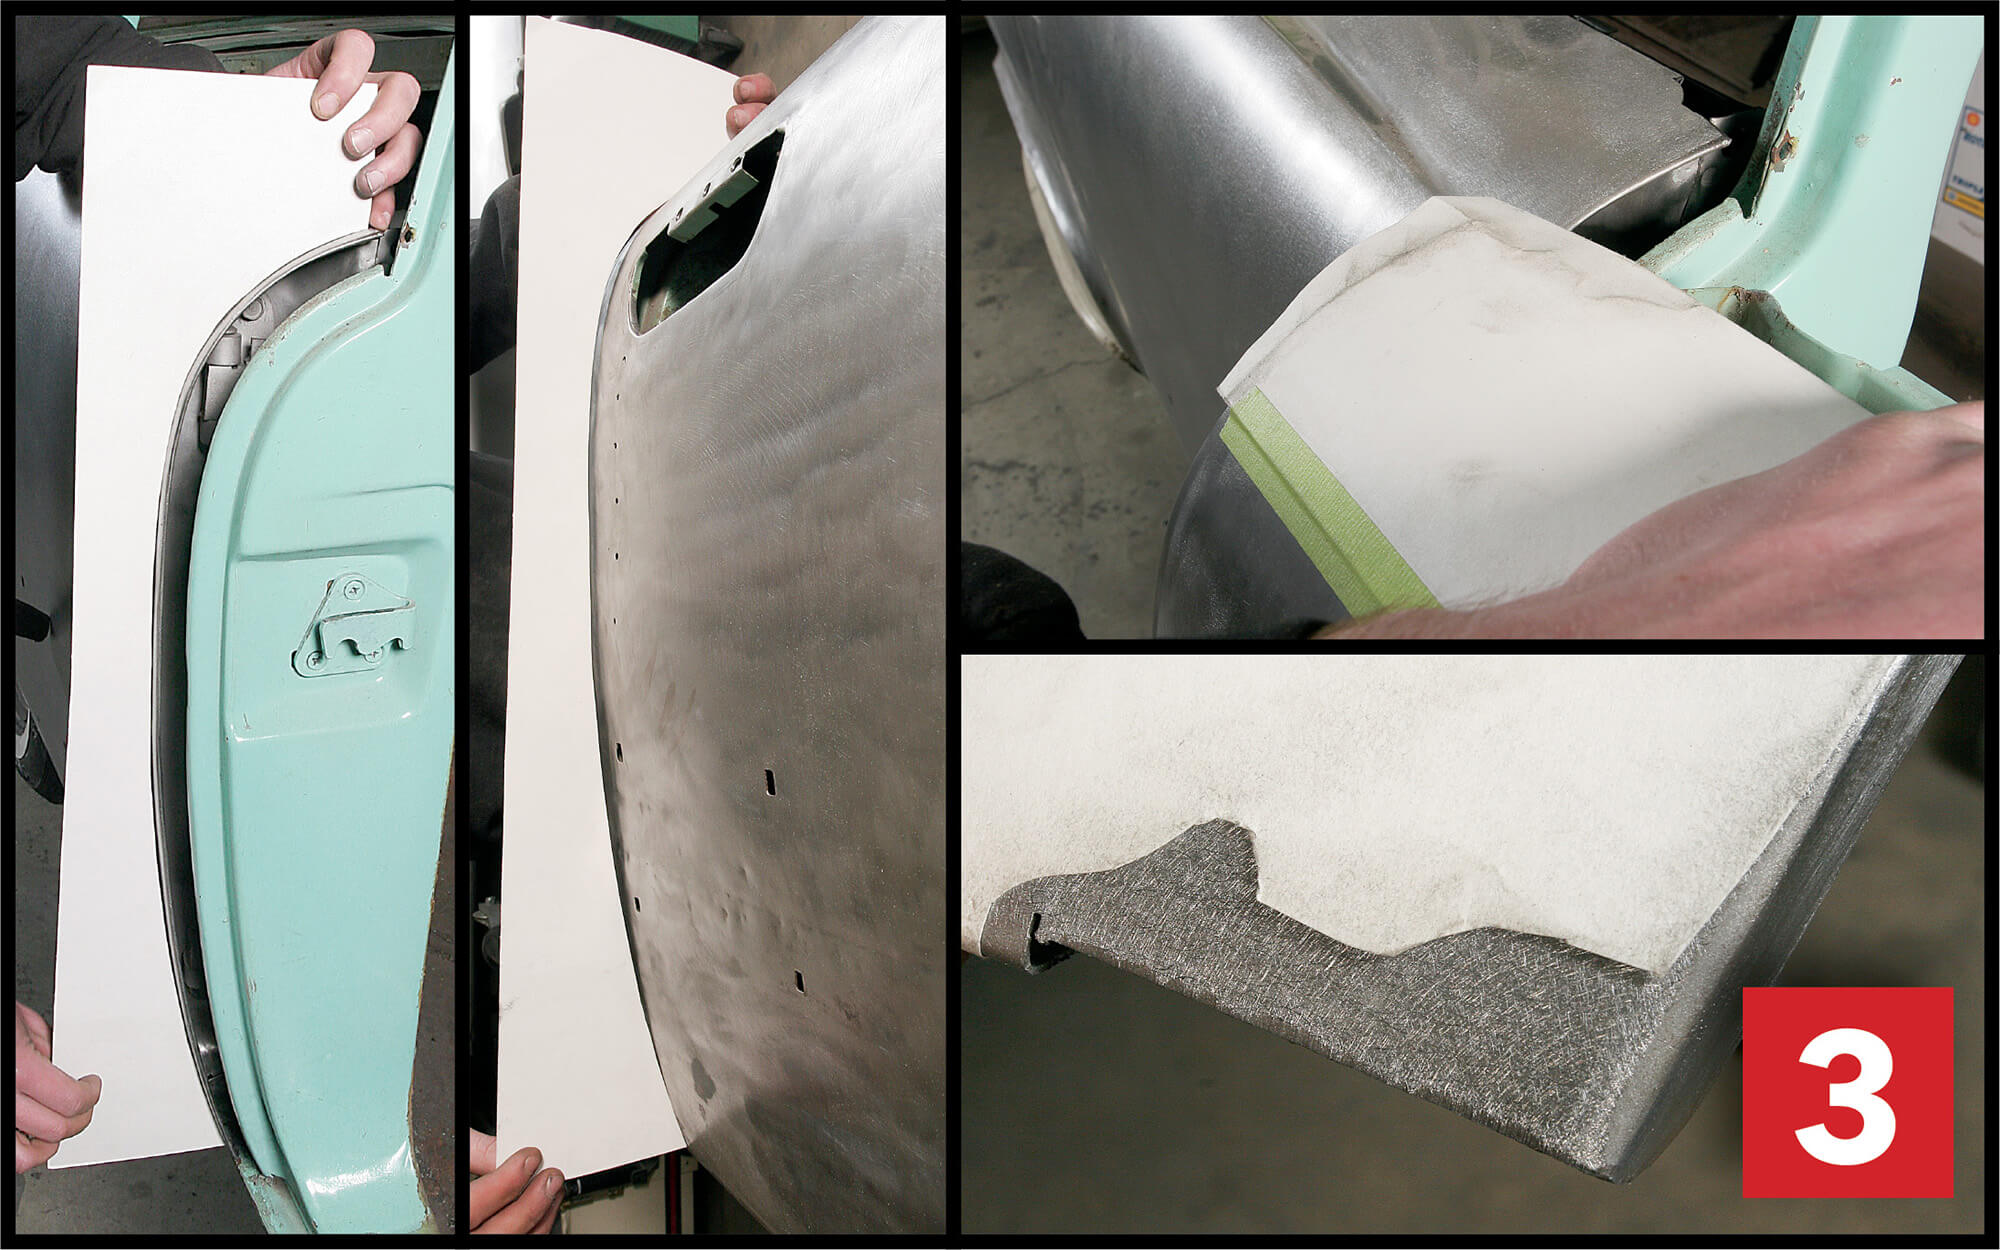
3. Making Templates
Because most work on the door was done with the door off the car, we made a cardboard template of the leading edge of the rear door to use as we straightened and recontoured the rear edge of the front door. When placed against the damaged area, it becomes more evident. Door skins will often fit other makes and models and require some trimming. To make a template of the trim area, we placed paper on the original door and rubbed the surface to reveal the contour.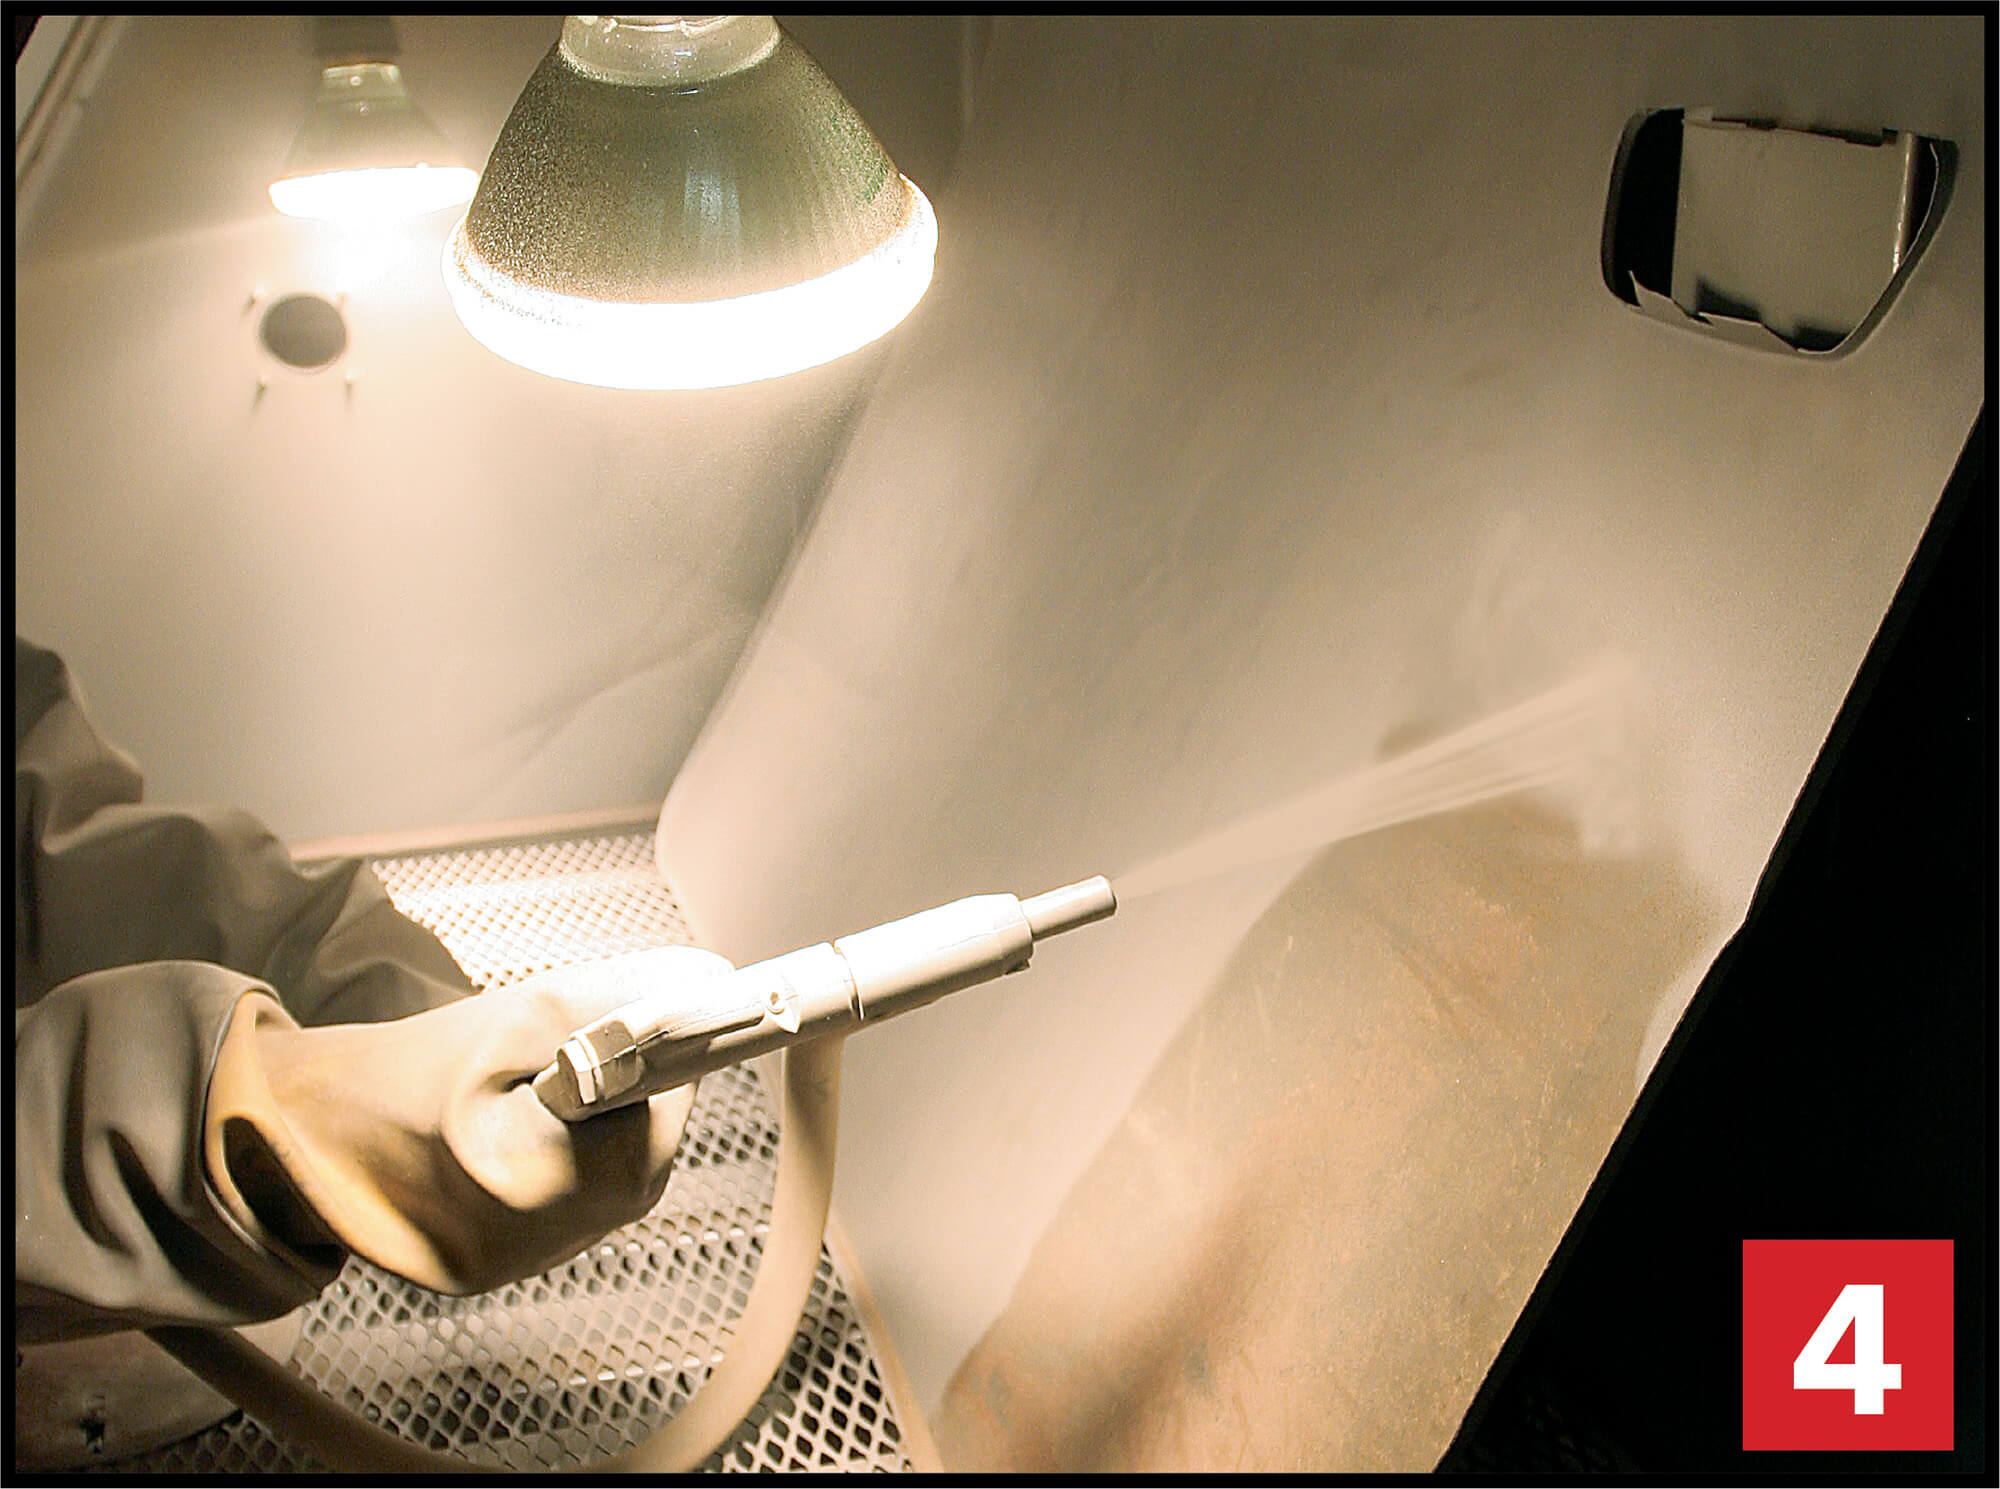
4. Preparation and Clean-Up
A good first step when working with vintage panels is a light media blasting. To prevent warping the sheet metal, hold the blasting gun at least 45 degrees to the surface and move quickly across the surface. Several light passes may be needed to thoroughly clean the surface, but avoid concentrating on any area for more than a moment, as heat builds quickly and warps the steel. After removing the old door skin, we will repeat this process with the inner door.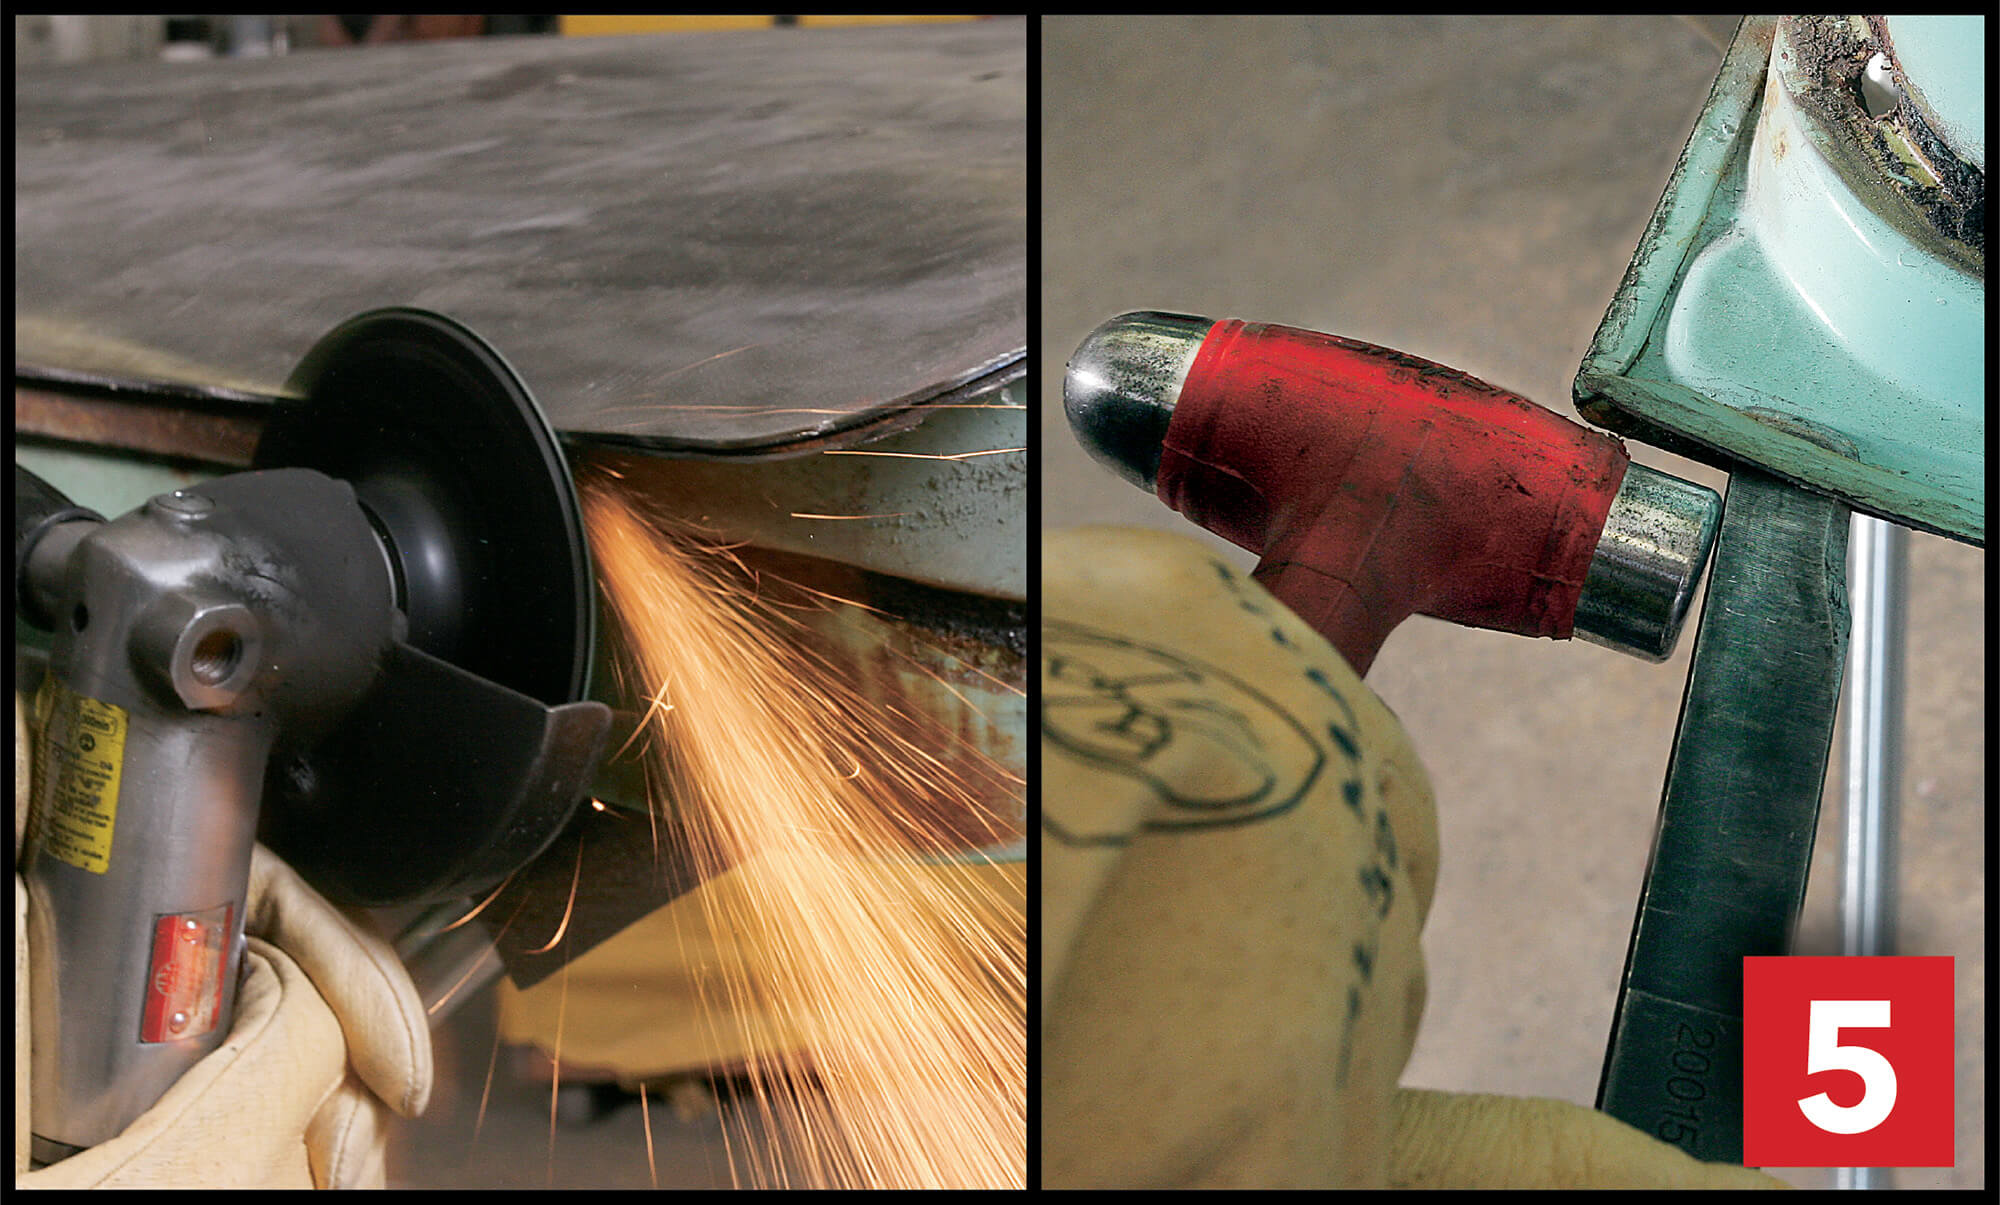
5. Removing the Skin
Using a five-inch high-speed sander, we slowly ground away the edge of the door until the hemmed edge opened up and the panels could be separated. The folded-over portion of the door skin is spot-welded and can be removed with a panel splitter.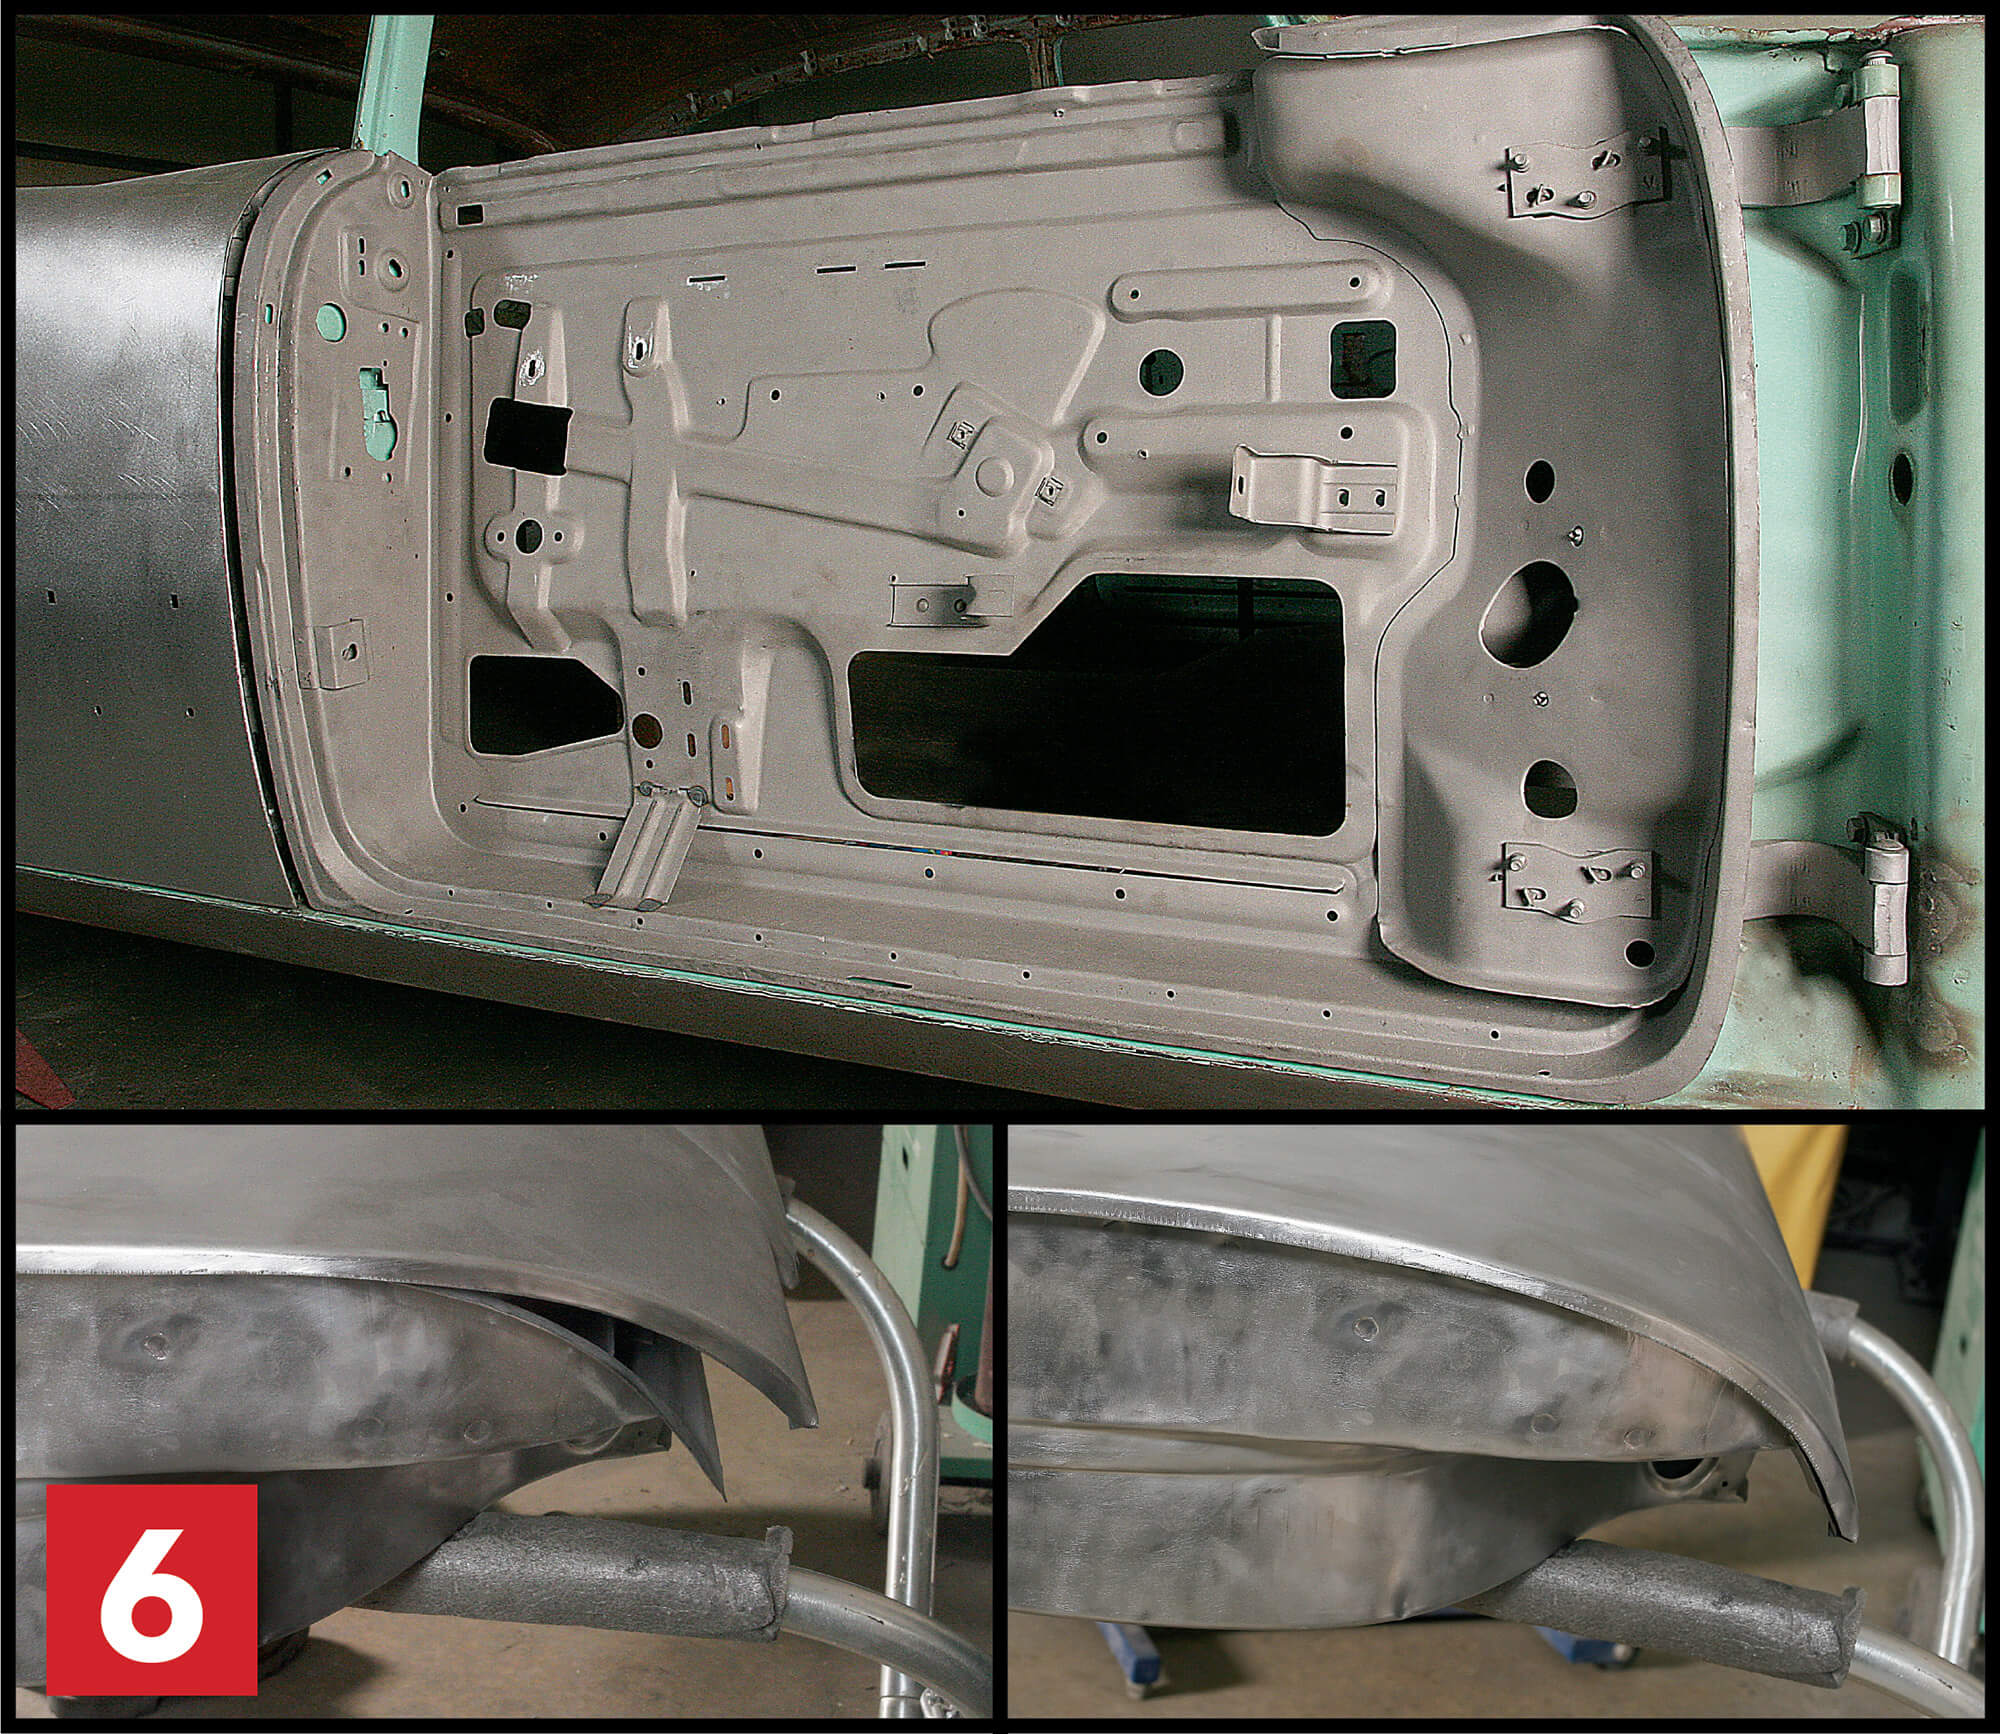
6. Fitting New Panel
We hung the inner door panel back on the car and straightened it to match the surrounding panels. It is important to have the new door skin fit as close as possible before hemming the edge over. A little hand-forming and metal shrinking on the edge had the skin fitting like new.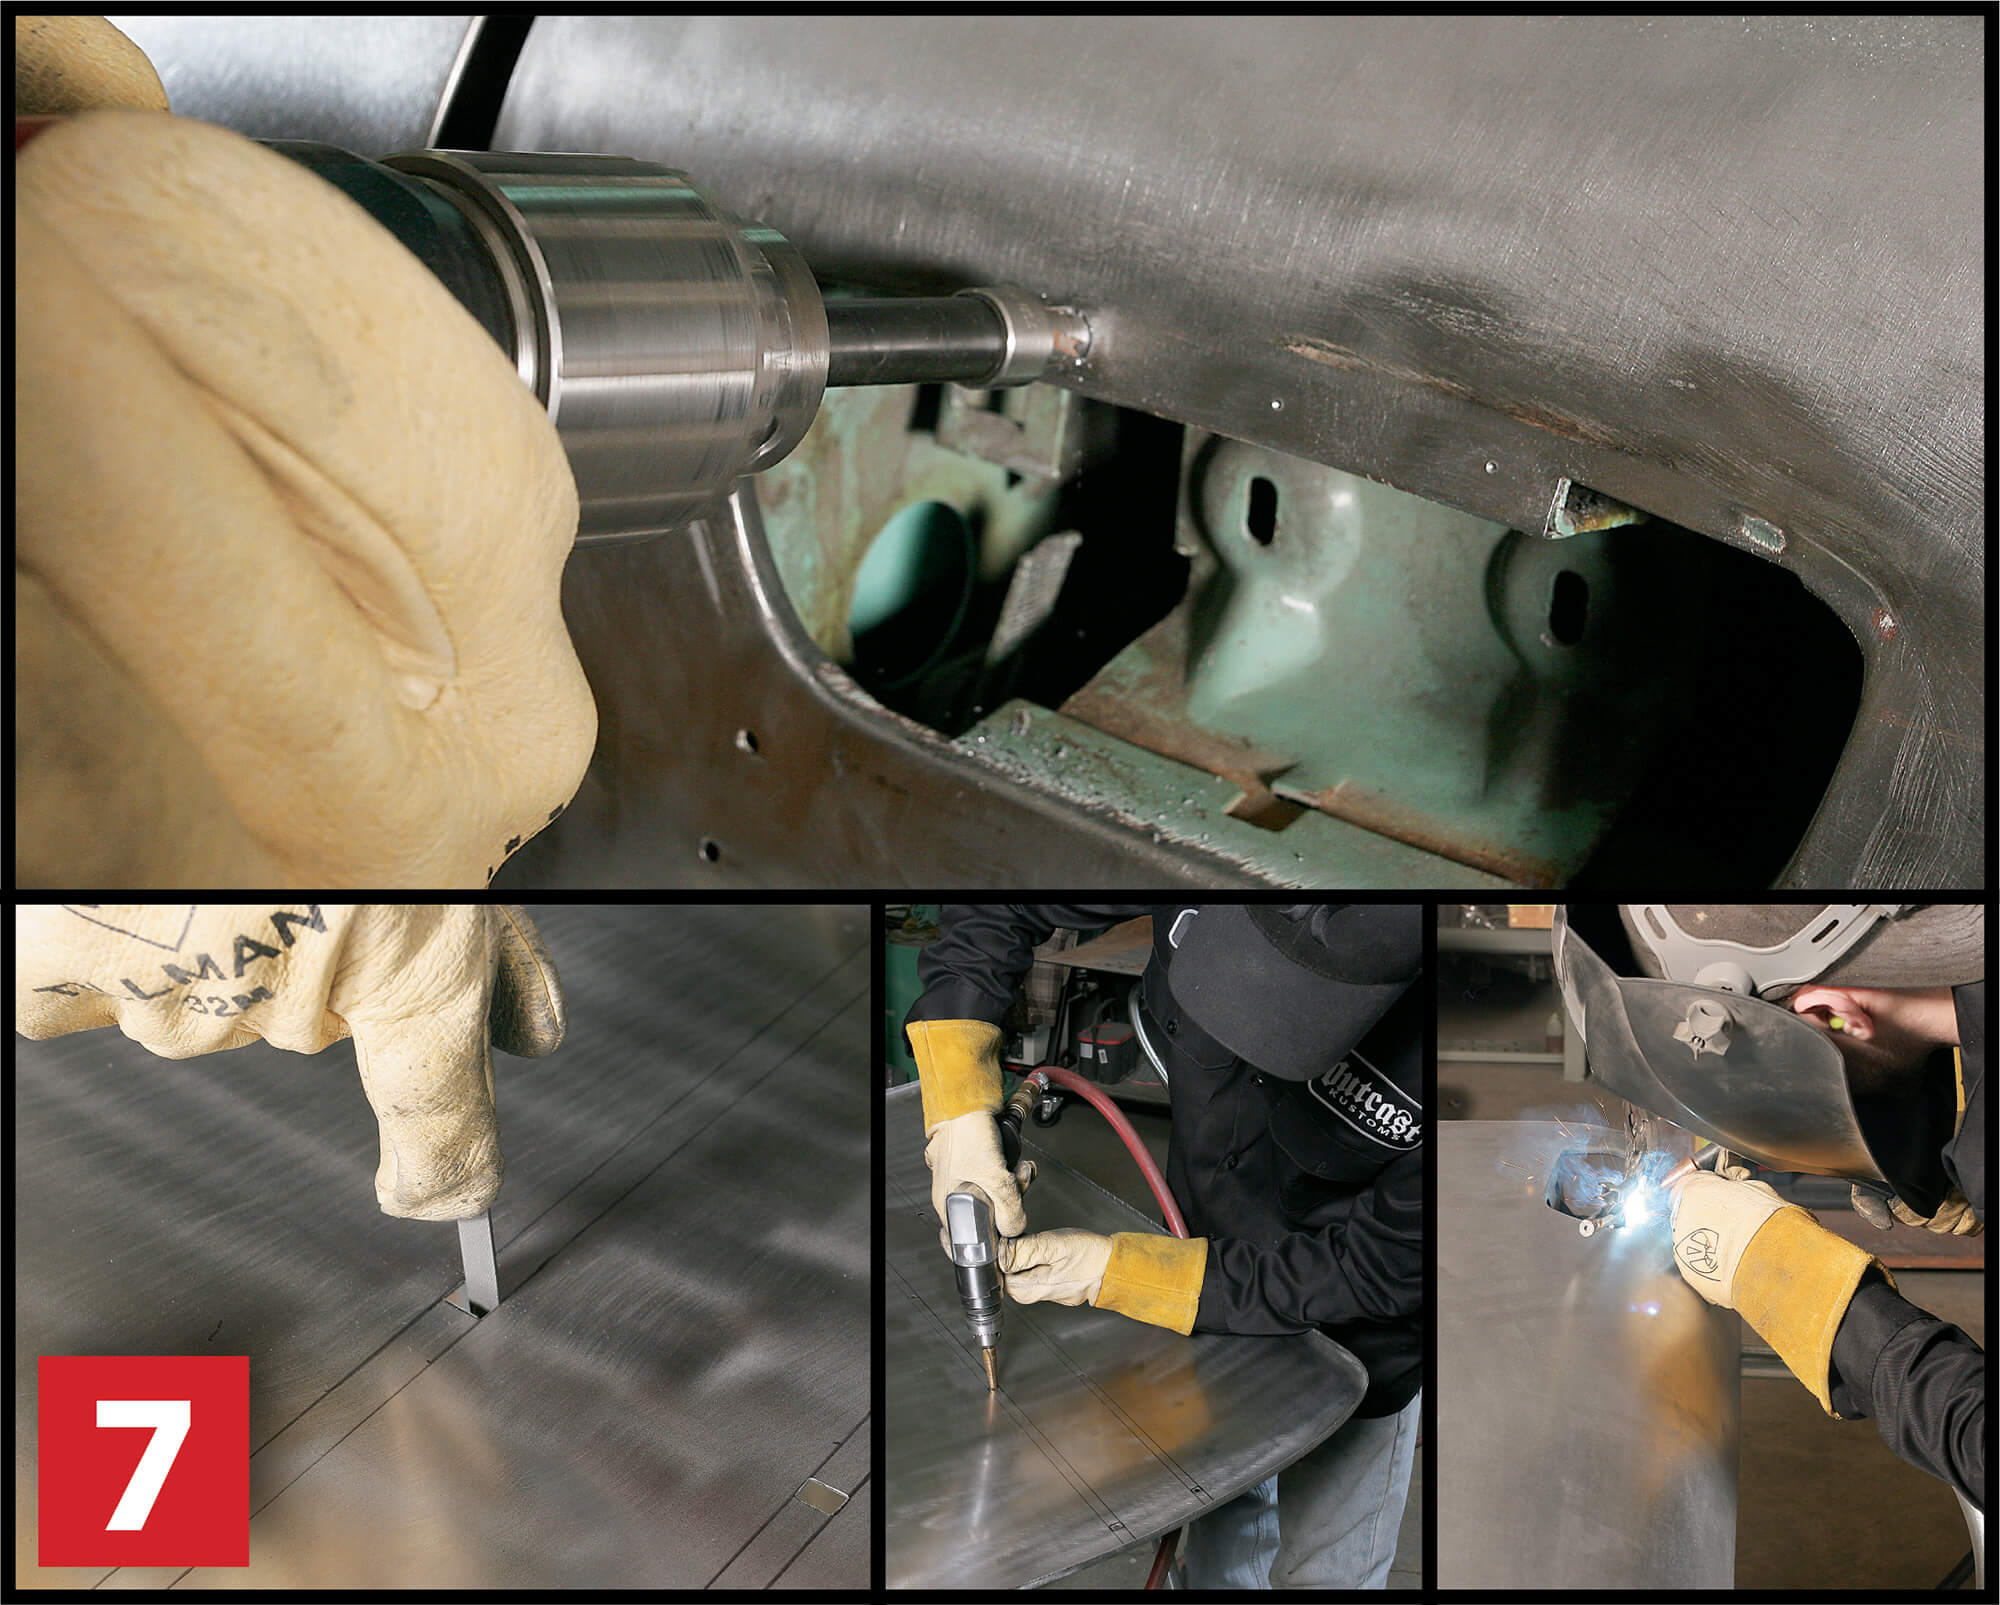
7. Trim Holes and Brackets
Most door skins will fit other years, makes, and models. For this reason, most do not come with the necessary trim holes. Using the old door skin as a template, we marked the locations and then drilled them out and filed them square to match the originals. Our door skin also had a separate bracket for the door handle. We drilled out the spot welds and plug-welded it to the new skin.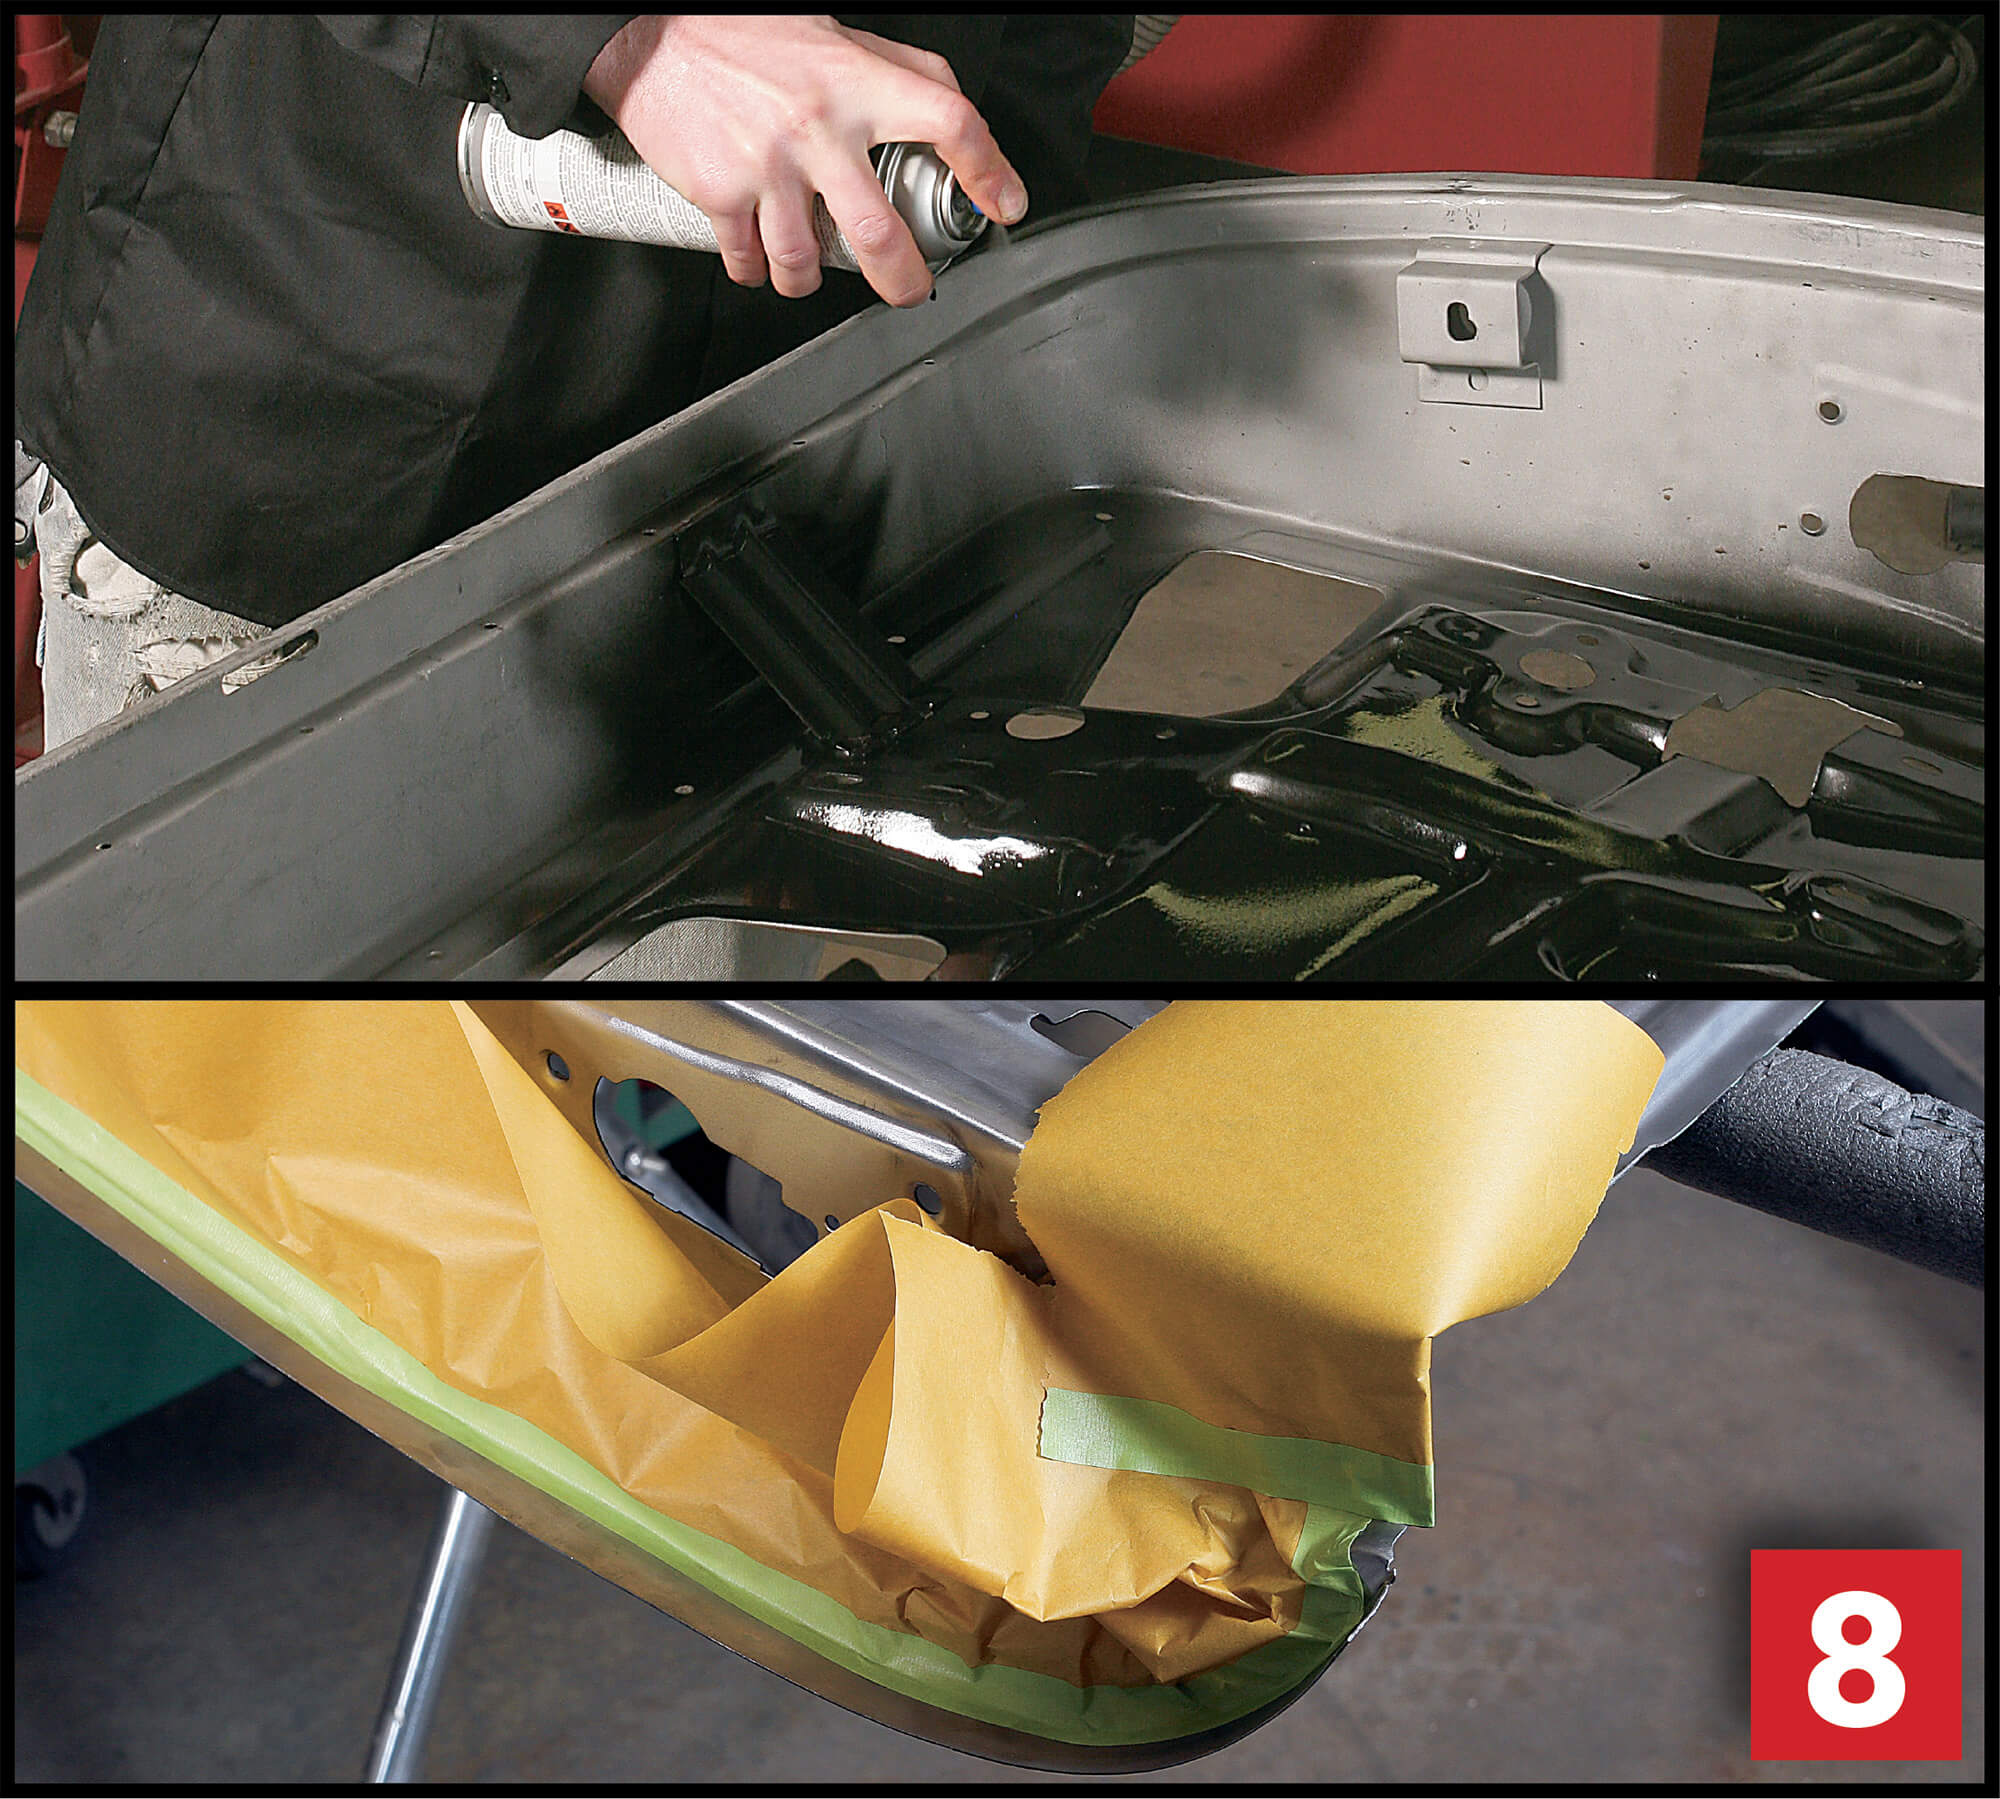
8. Rust Prevention
Before joining the door skin to the inner door panel, we gave everything several coats of self-etching primer. We also primed the edge where the metal will overlap when the new skin is attached.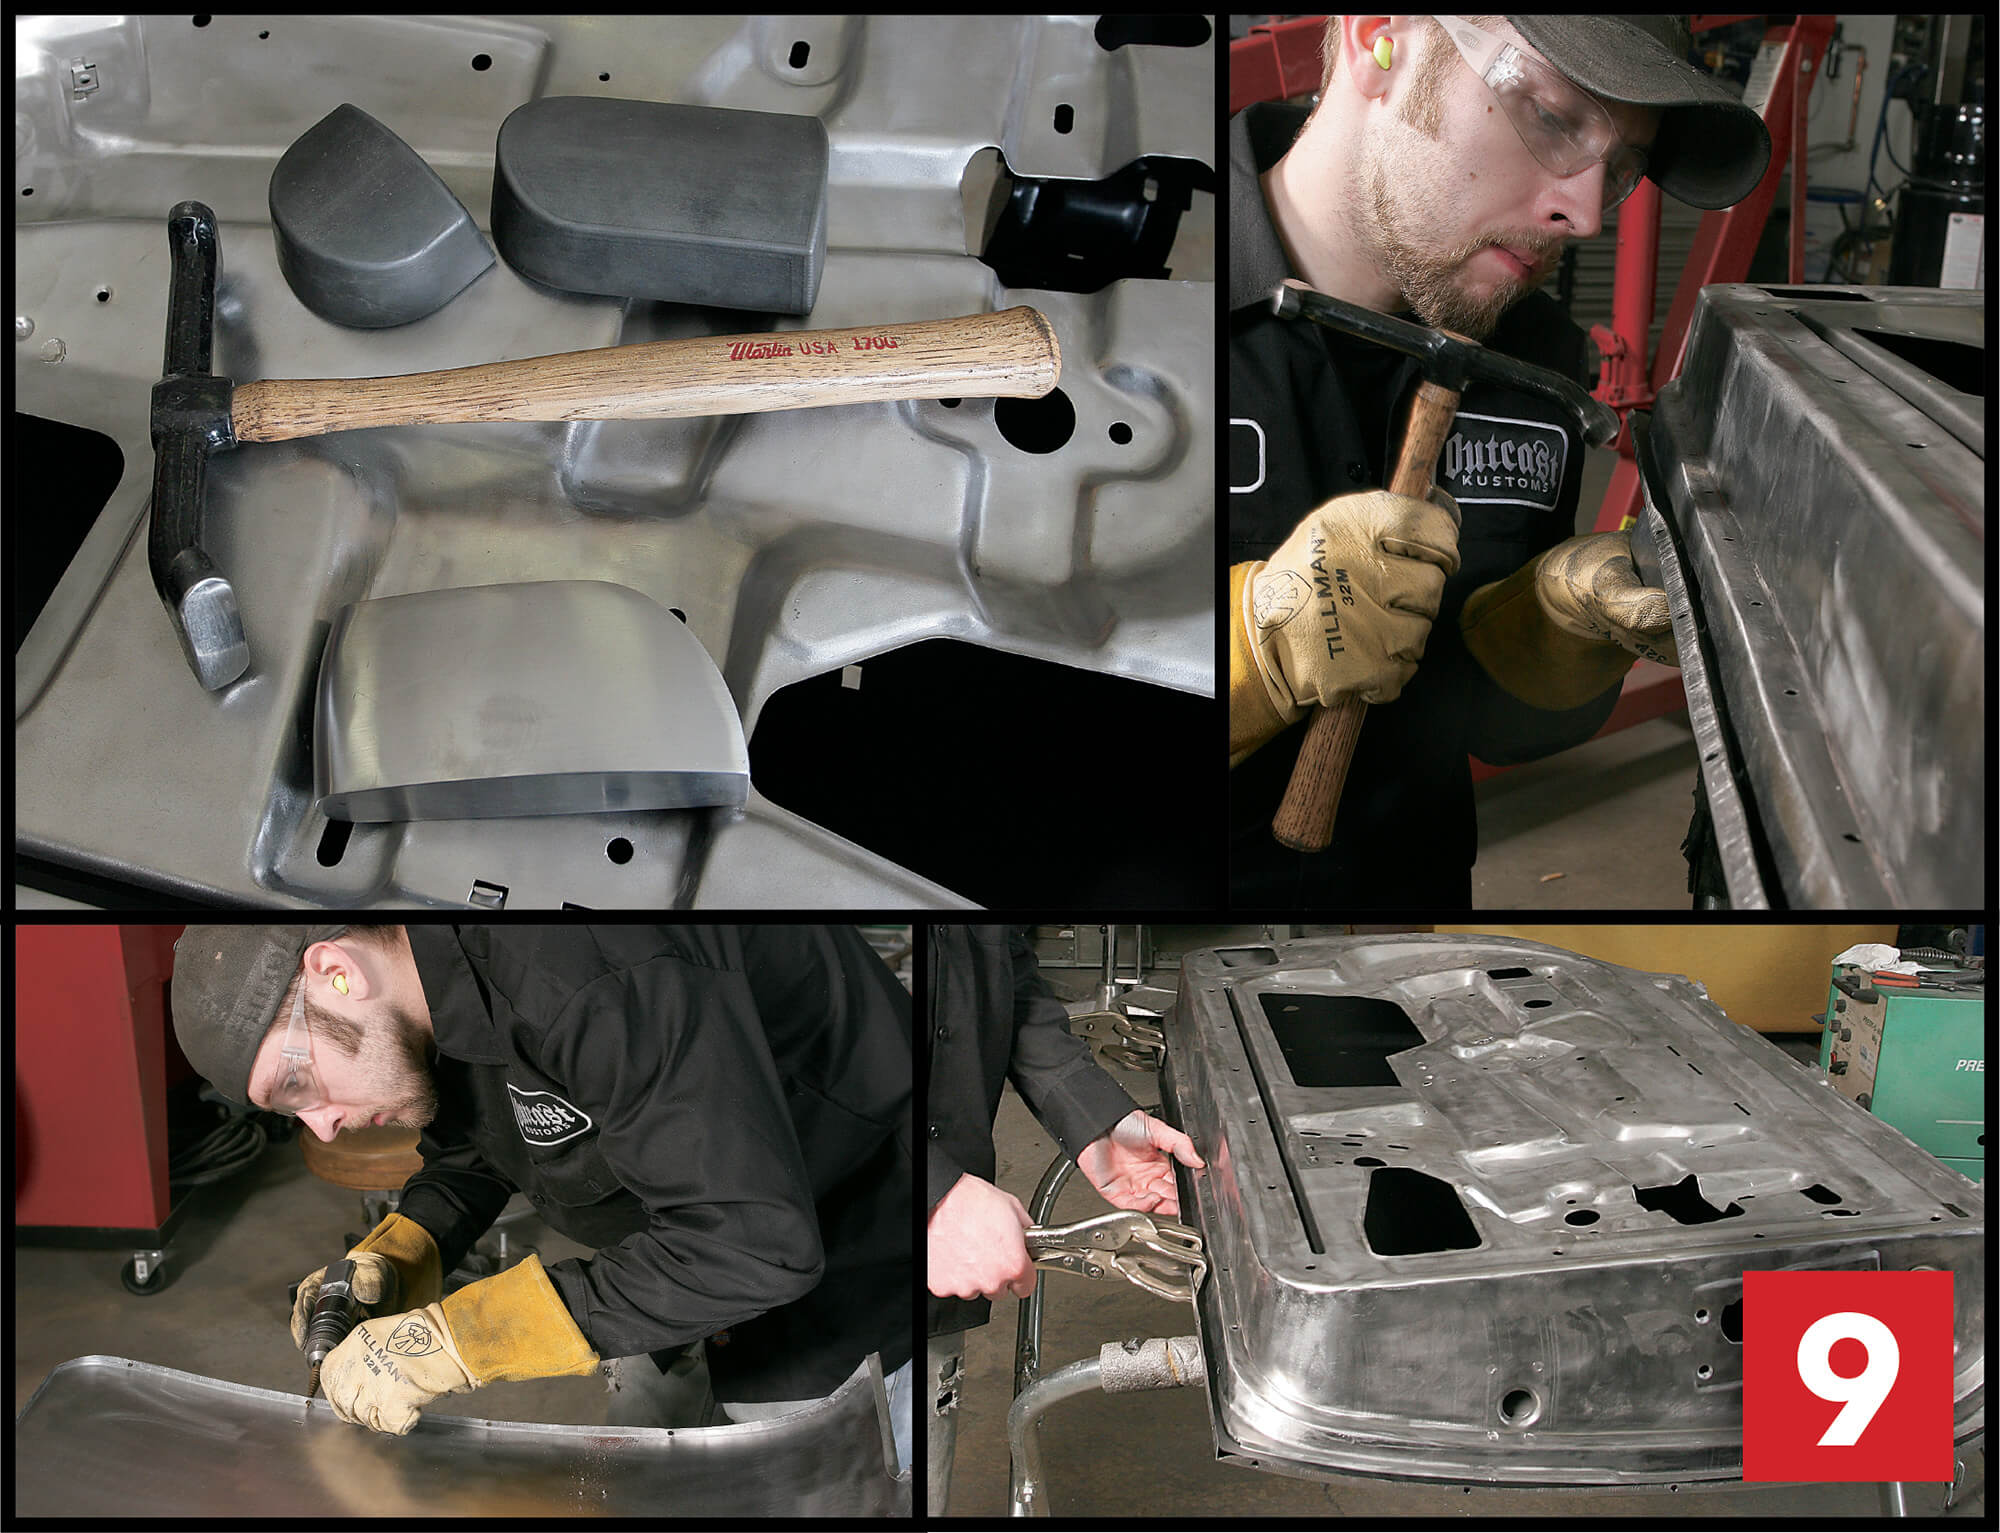
9. Hemming the Edge
Next, the edge flanges on the door panel were drilled every six inches so the new skin could be plug-welded in place later. The door skin was carefully clamped in place and checked again for fit. Using a door skinning (hemming) hammer and a steel toe dolly, the flange was slowly folded over the inner door structure. It is important to work slowly over the entire edge to prevent buckling the new skin. The door skin edges were then fine-tuned using a body hammer and a rubber-covered heel dolly.

I'd like how to fab one from scratch.
I hope y’all did a video while you made theses repairs. I especially be interested finding out how to use a door skinning hammer as I have never heard of that tool. It would be helpful to see the process of bending the skin edge over the inner door structure as I’m sure it’s easy to bend too fast and ripple, dimple or mar the edges. It’s good to know where to find lesser commonly available body parts too. Thanks for the well written article with pics. If pictures are worth a thousand words- videos are with millions.
very good ..ta lots
Really enjoy all these tips. The Source Info will be especially helpful to all us enthusiasts. Keep it coming. Thanks!
Good job.Enjoyed.
I'm working on a '29 Chevy 2 door coach and am replacing the wood. I need to remove the door skins to replace some pieces behind parts of the metal structure. What tool is available for this action? Or will I have to make one? Grinding off the lip is undesirable.
Nice story !
good workmanship!
A great coverage of the operation. Good to be tolled about American Muscle car in Arcaniom OH. Thank you. Phil.
What would this estimated cost be for one average door?