Engine Vacuum Troubleshooting
Mark Simpson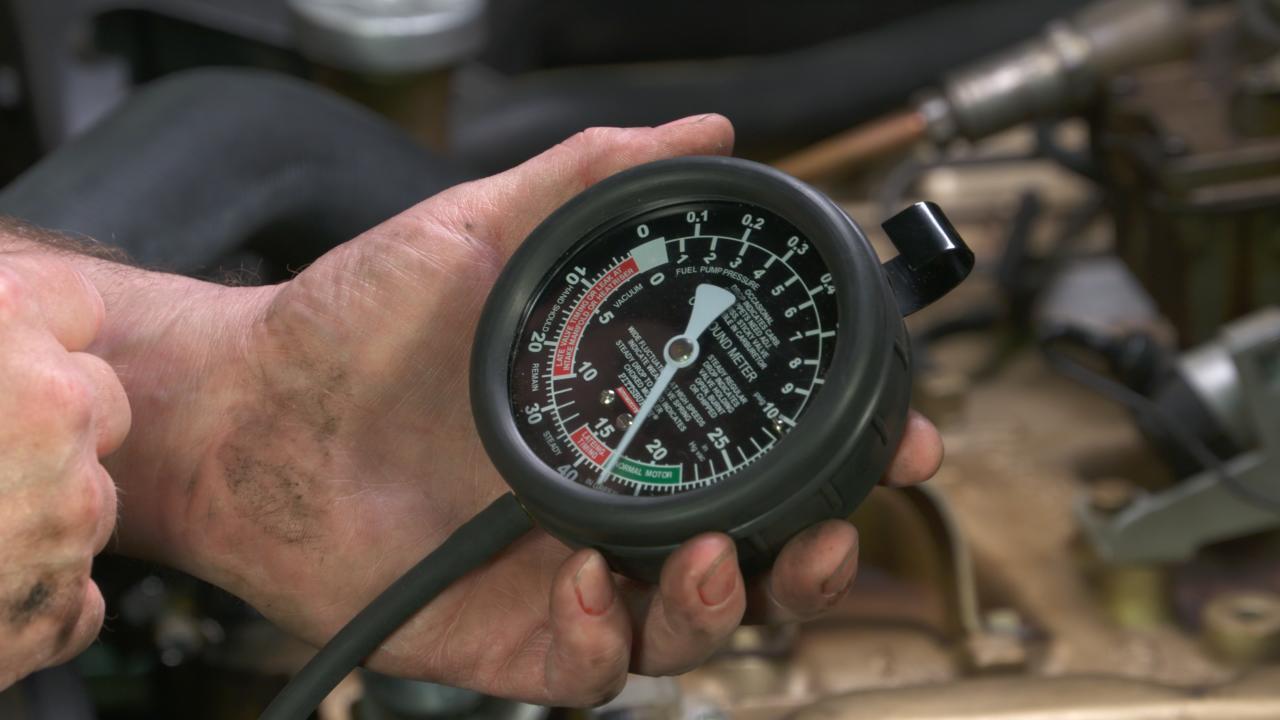
Video Player is loading.
Years ago, a good friend introduced me to using a vacuum gauge to diagnose engine problems, in fact, it was often the first tool he would reach for when confronted with a poorly running engine.
I’ll admit to being a little skeptical at first, but over the years I have become convinced that engine vacuum is a great source for information in helping diagnose problems inside the engine. Of course, high-performance engines with lopey camshafts often make little vacuum but even then the vacuum gauge can give you insights to the inner workings of your engine.
Simply put, the vacuum gauge has proven itself time and time again to be an invaluable tool in troubleshooting engine problems.
Engine Vacuum Troubleshooting
Before beginning any vacuum testing, a visual inspection should be made of the entire vacuum system. Check all hoses, hose connections, and all open ports on carburetors and intake manifold are plugged. (Note: Some cars also have vacuum operated heat/ac controls.)
To get started, hook the vacuum gauge to an intake manifold vacuum source. Manufacturers install ports on their manifolds for lots of different reasons: Brake Booster, PCV tube, EGR Switch, A/C vents, etc. You simply need to find one small enough for the vacuum gauge line to slide onto firmly. This is also done with a tee on an existing line or pulling a line and connecting it directly (for example, the vacuum line to the transmission can be used). Start your engine and allow it to come up to operating temperature before testing.
Diagnosing the Problem
The key to using a vacuum gauge to diagnose engine problems is to understand exactly what the gauge is telling you. When armed with this knowledge you’ll be able to quickly discern between simple tuning issues to potentially more severe mechanical problems.
Common Vacuum Test Results:
Normal Engine: On most engines, accelerate to around 2000 rpm and then quickly release the throttle. The engine should snap right back to a steady 17- 21″hg vacuum.
Steady low between 5-10″hg vacuum: This indicates that the engine has a leak in the intake manifold or the intake gasket.
Steady low between 10-15″hg vacuum: This reading indicates late valve timing. There’s a chance the vehicle has jumped timing. Check the timing belt or chain depending on the application.
Steady low between 15-18″hg vacuum: This low reading indicates retarded ignition timing. Advance the timing on the distributor to correct this problem, and recheck vacuum.
Fluctuating Needle: A fluctuating needle indicates there’s a problem with a valve or a there’s an engine misfire.
Needle drops during acceleration: If the needle drops steady during acceleration there’s a restriction in the exhaust or intake. This is typically due to a clogged muffler or exhaust system.

Print this out and hang it on your toolbox, and you’ll never second guess what your gauge is telling you!
What Brought me this question is that my cruise control stopped worki thought it was a broken vacuum line I did some repairs to some brittle lines leading to the cruise control actuator but that didn't take care of it I had a code thrown regarding the large leak and canister circuit. I settled with that I have no code now but I still have about 10PSI at 60 miles an hour and 5 to 6 in city traffic when I shut the motor off I have tended to 12
Someone tell me on a Dodge engine why is a manifold pressure vacuum would be higher when the engines off