Building or modifying a street rod often requires numerous decisions based on performance needs, intended use, and budget constraints. When it comes to rear suspension, there are numerous options that should be considered to keep your project firmly planted on the ground and headed in the right direction.
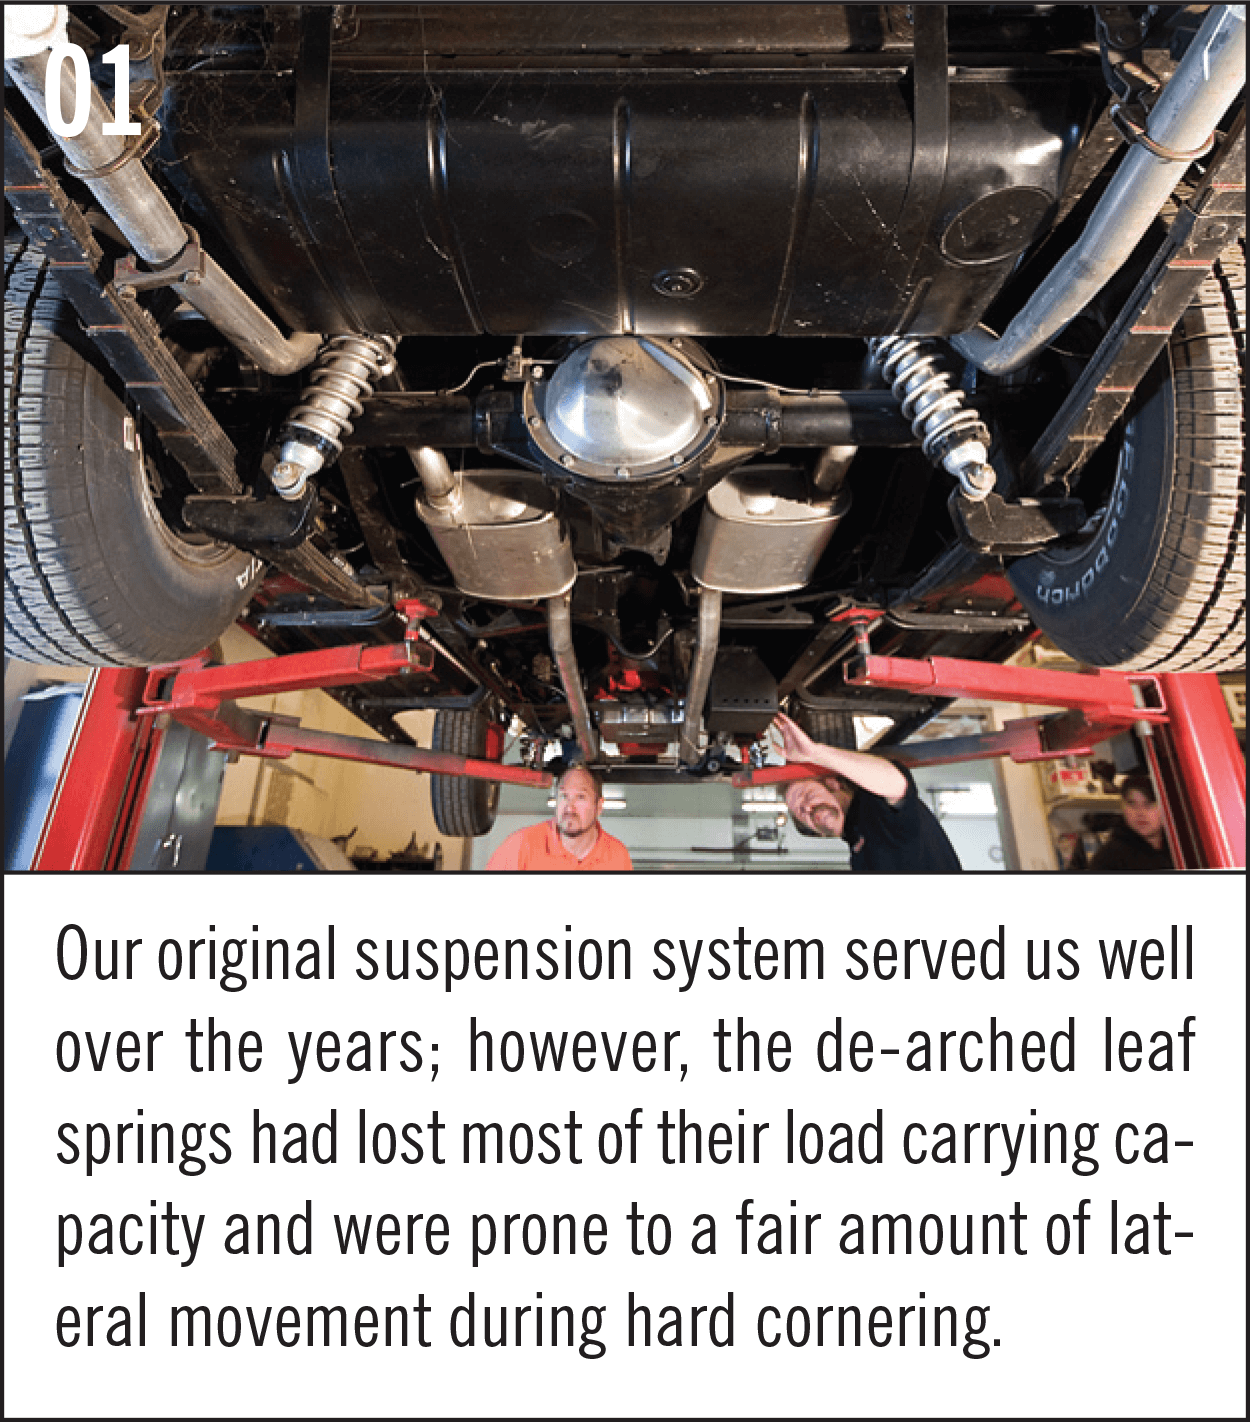
Years ago, when I first started my ’35 Chevrolet project, I knew I wanted a low stance and a smooth, but relatively traditional, street rod look. I chose to utilize the original rear leaf springs, in part to keep the project within my established budget. After the narrowed ten-bolt Chevy rear axle was in place, it was apparent that additional work was necessary to get the lowered stance I desired. To accomplish this, I had the rear springs de-arched four inches and built a set of 5/8-inch offset two-inch lowering blocks.
This gave me the low ride I desired, but allowed for plenty of suspension travel. After completing my ride and getting out on the road for the first time, I discovered I had significantly compromised the load capacity of the rear springs, and with passengers in the rear, the car was prone to bottoming out. While not ideal, a set of coil-over shocks with lightweight progressive springs alleviated the problem until I was ready to return to the shop and reengineer the rear suspension.
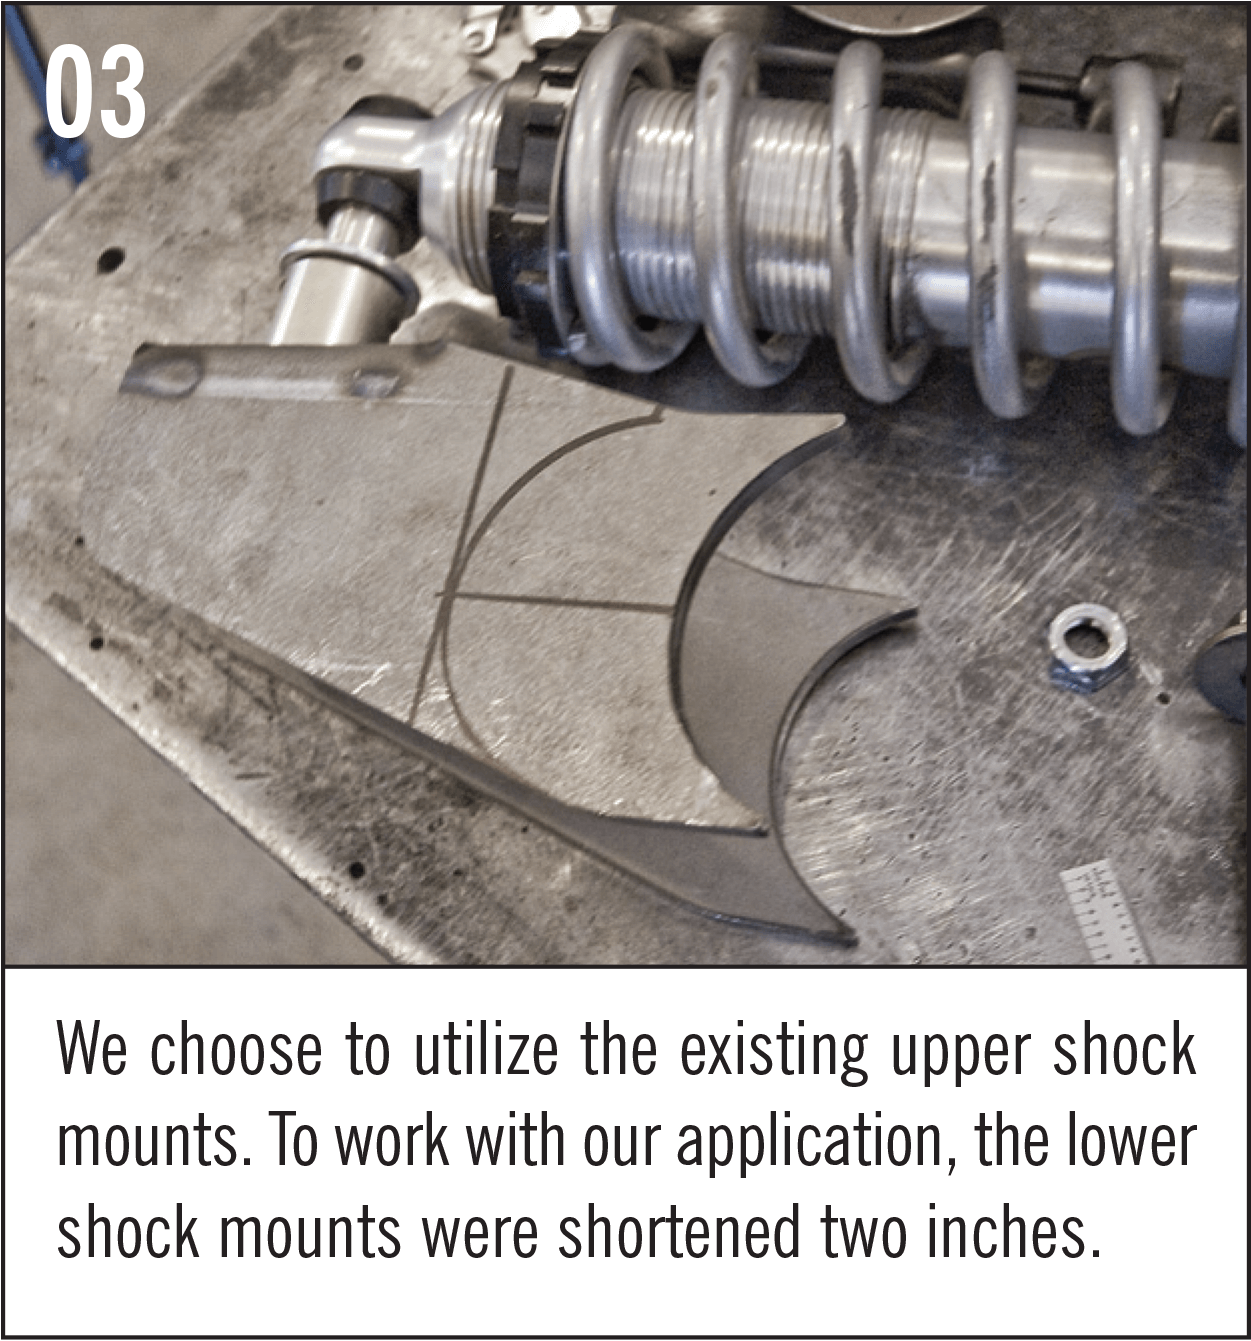
After blowing a head gasket a few years ago, I took the opportunity to revisit my entire driveline before putting the old bowtie back on the road. The 400ci small block engine gave way to a far more potent GM Performance Parts 383 engine, and the tired TH400 transmission was soon replaced by a bulletproof Gearstar 4L60, giving me the overdrive I desired. Soon my attention was squarely focused on the rear axle and suspension, which I knew would be the weak link in the system.
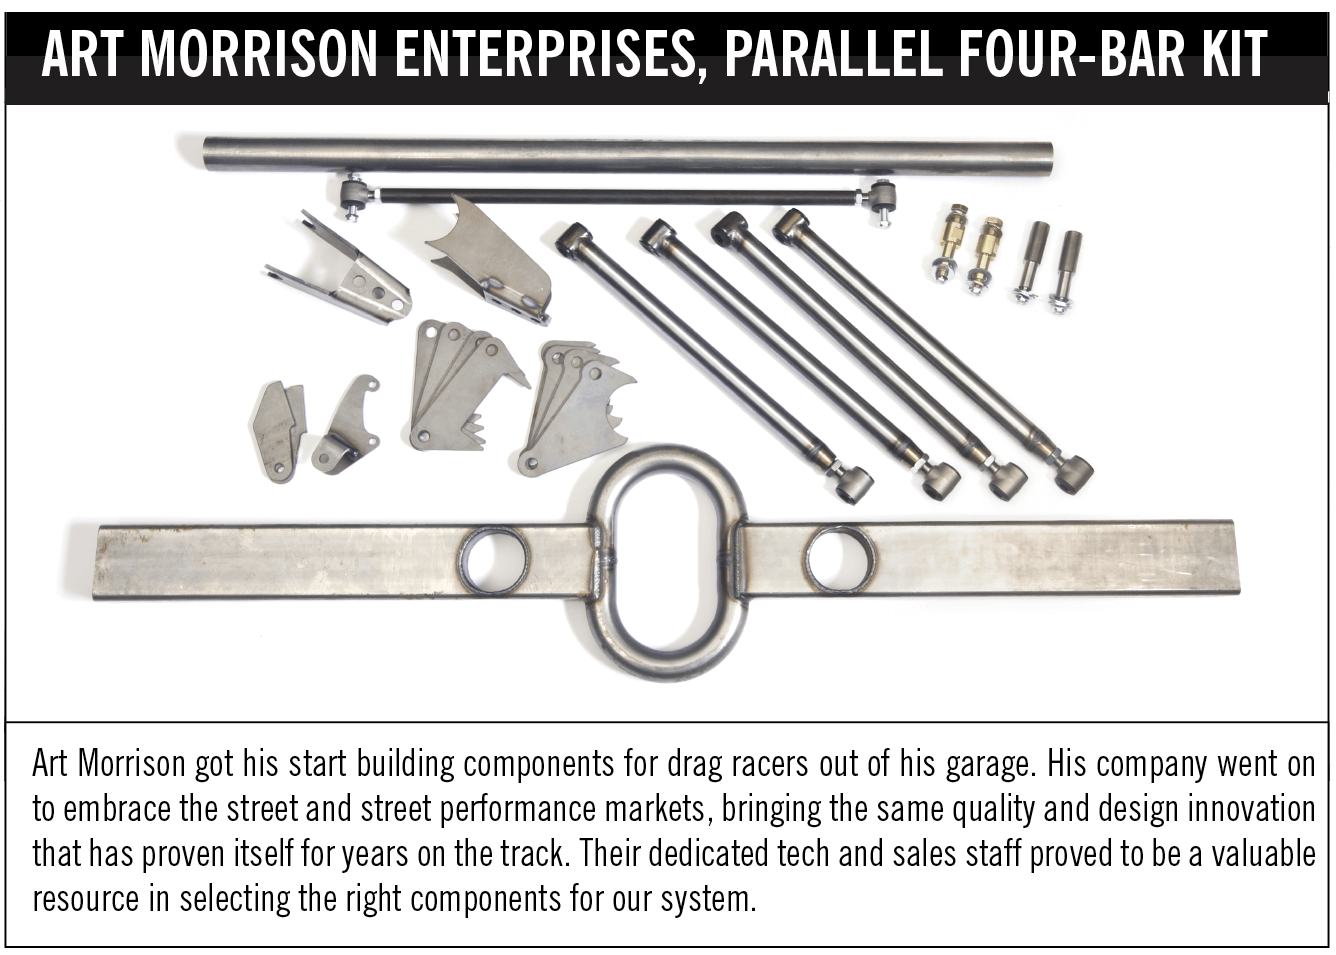
When considering the options for rear suspension systems (see below), I soon focused on two options: triangulated four-bar and parallel four-bar. A call to the folks at Art Morrison Enterprises soon set me in the right direction.
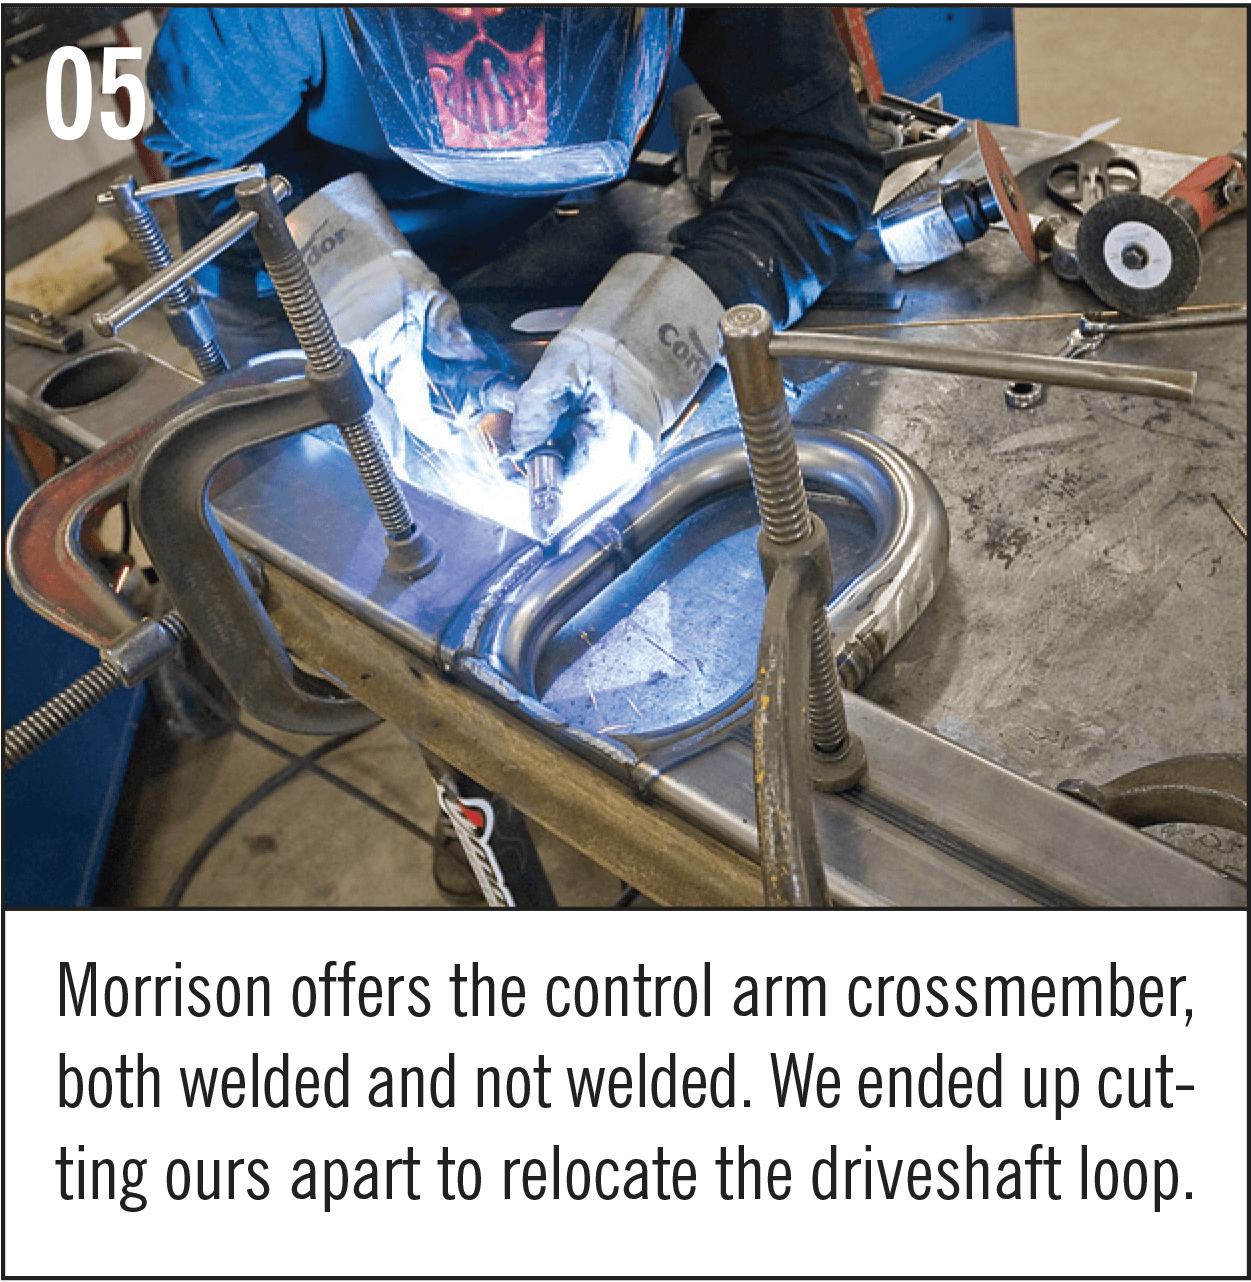
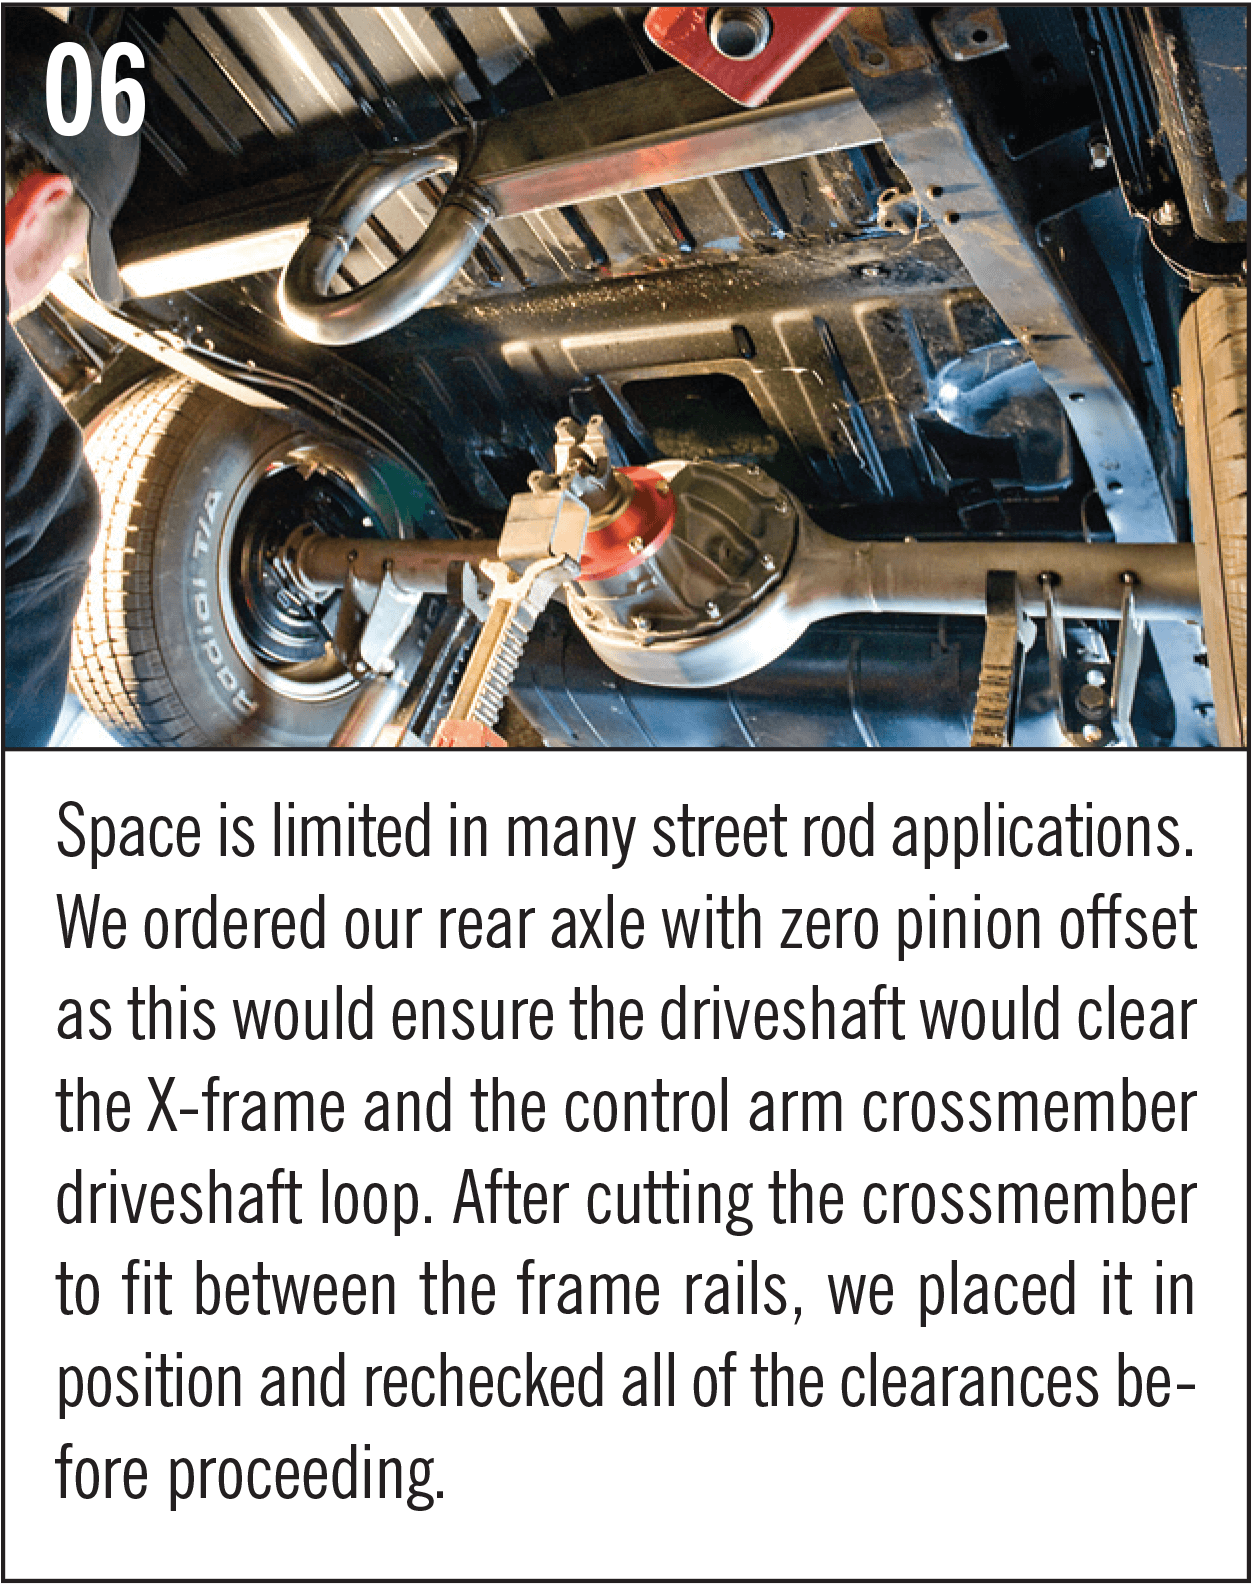
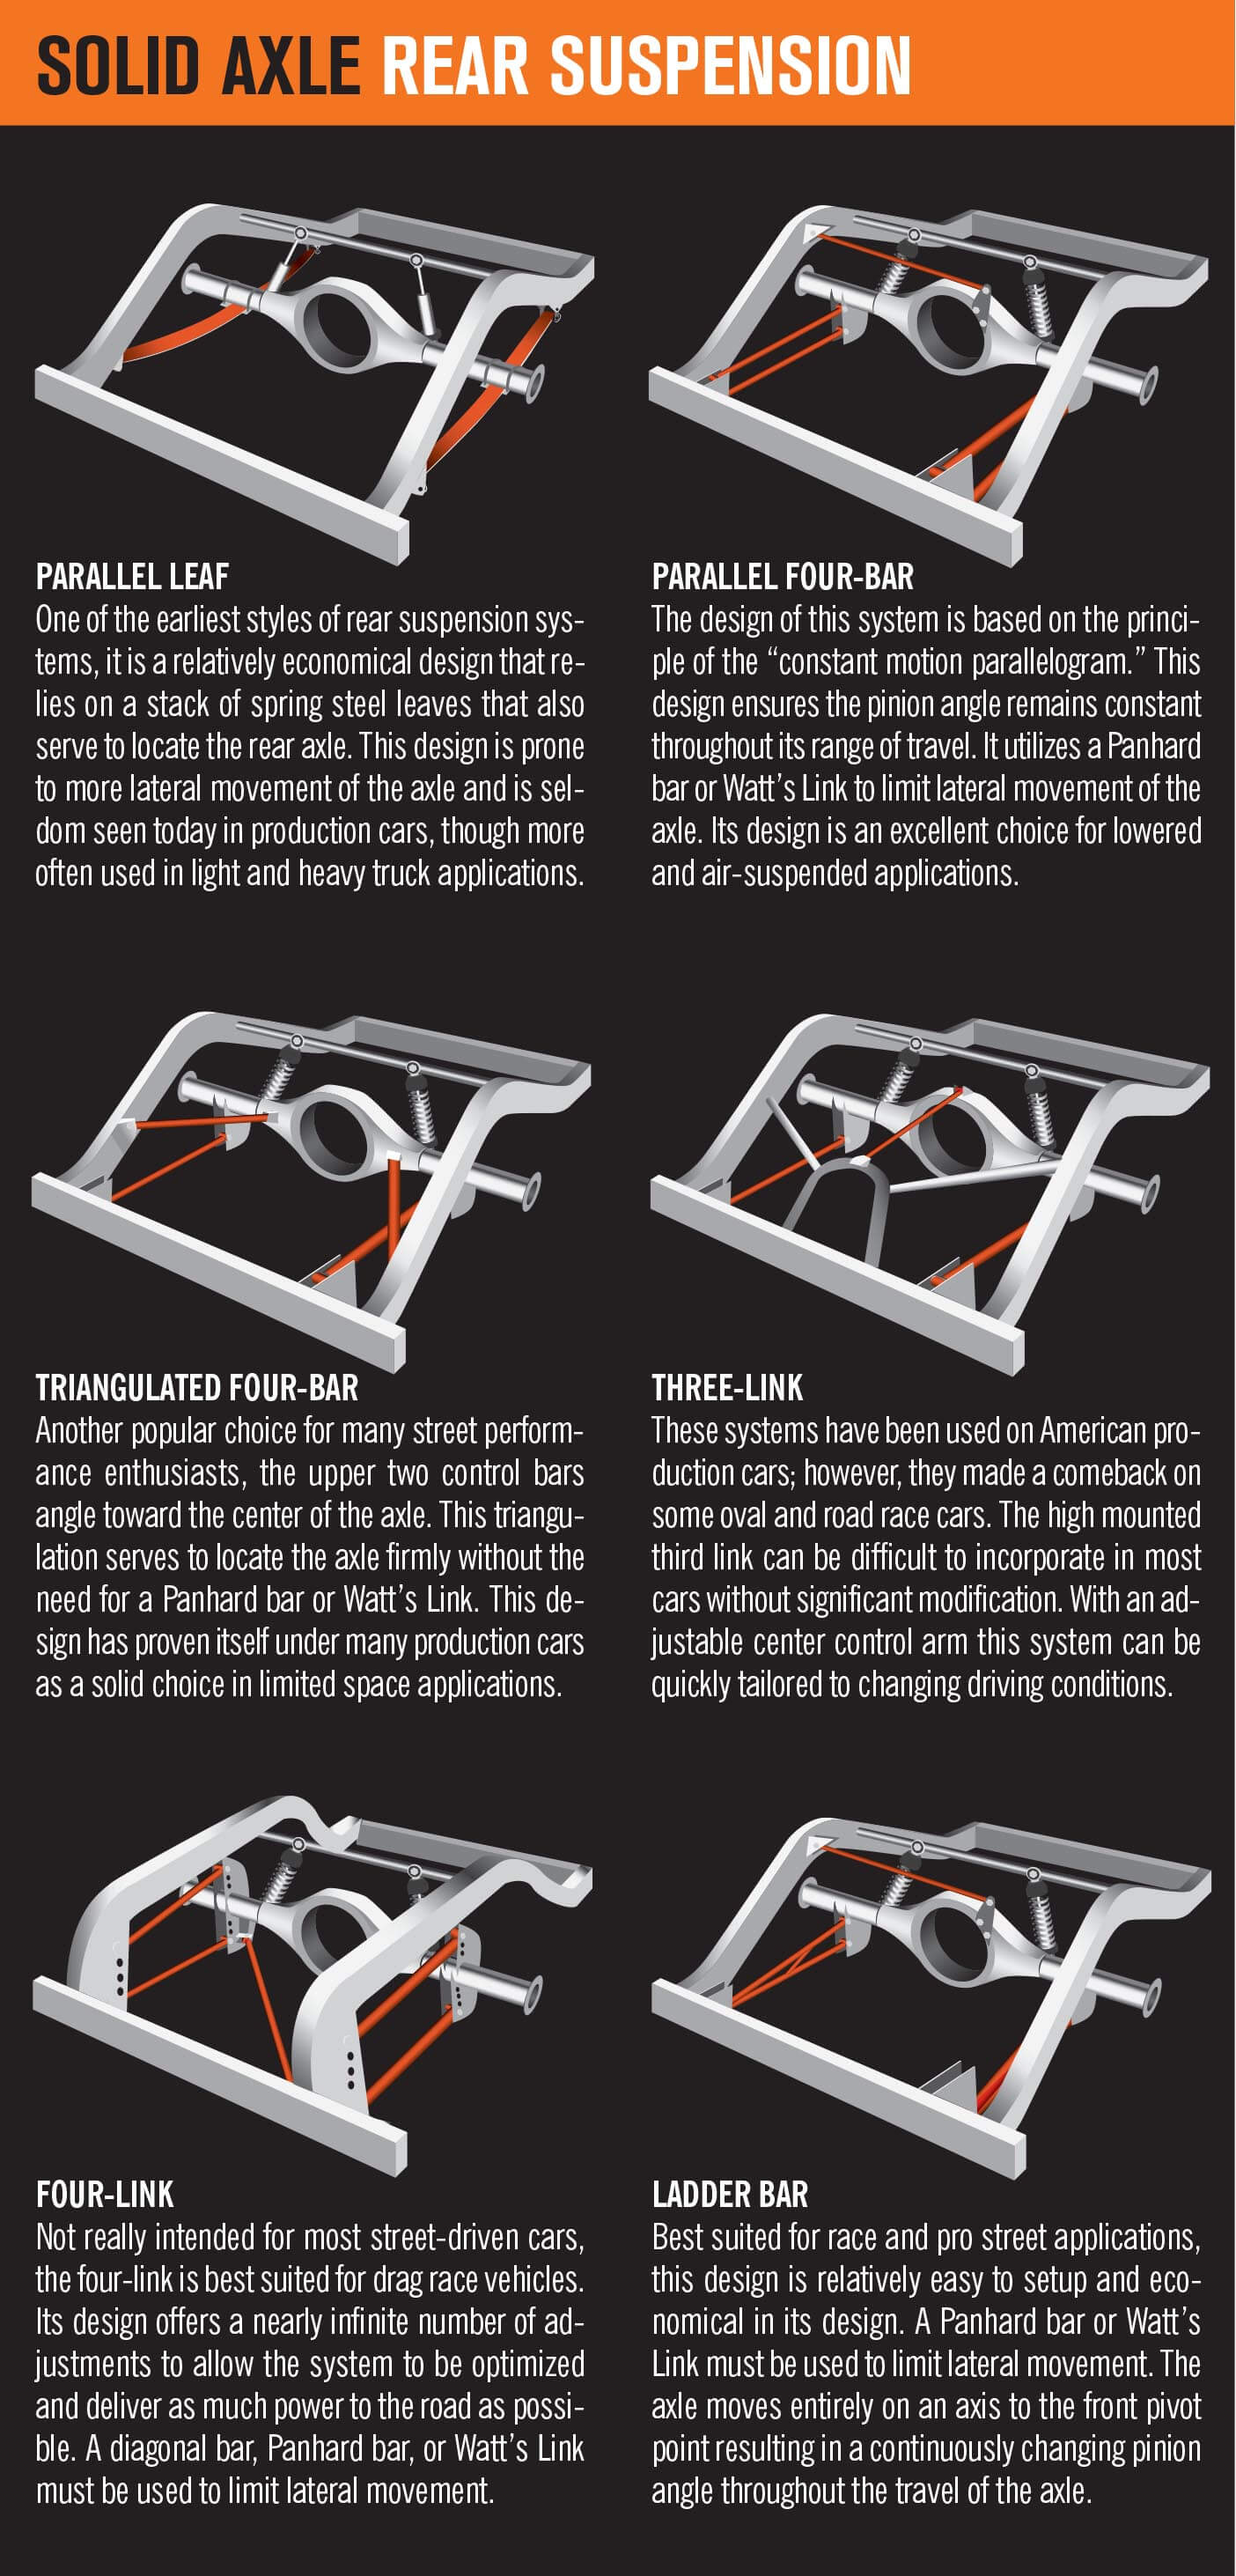 The triangulated four-bar systems do not require a Panhard bar to laterally locate the rear axle (although in tight street rod applications, routing exhaust can become far more difficult). Art Morrison also pointed out that for optimal operation, they should not be used on frames narrower than 39 inches. Also, throughout their use, the pinion angle can change slightly as the two sets of suspension arms travel on different axis.
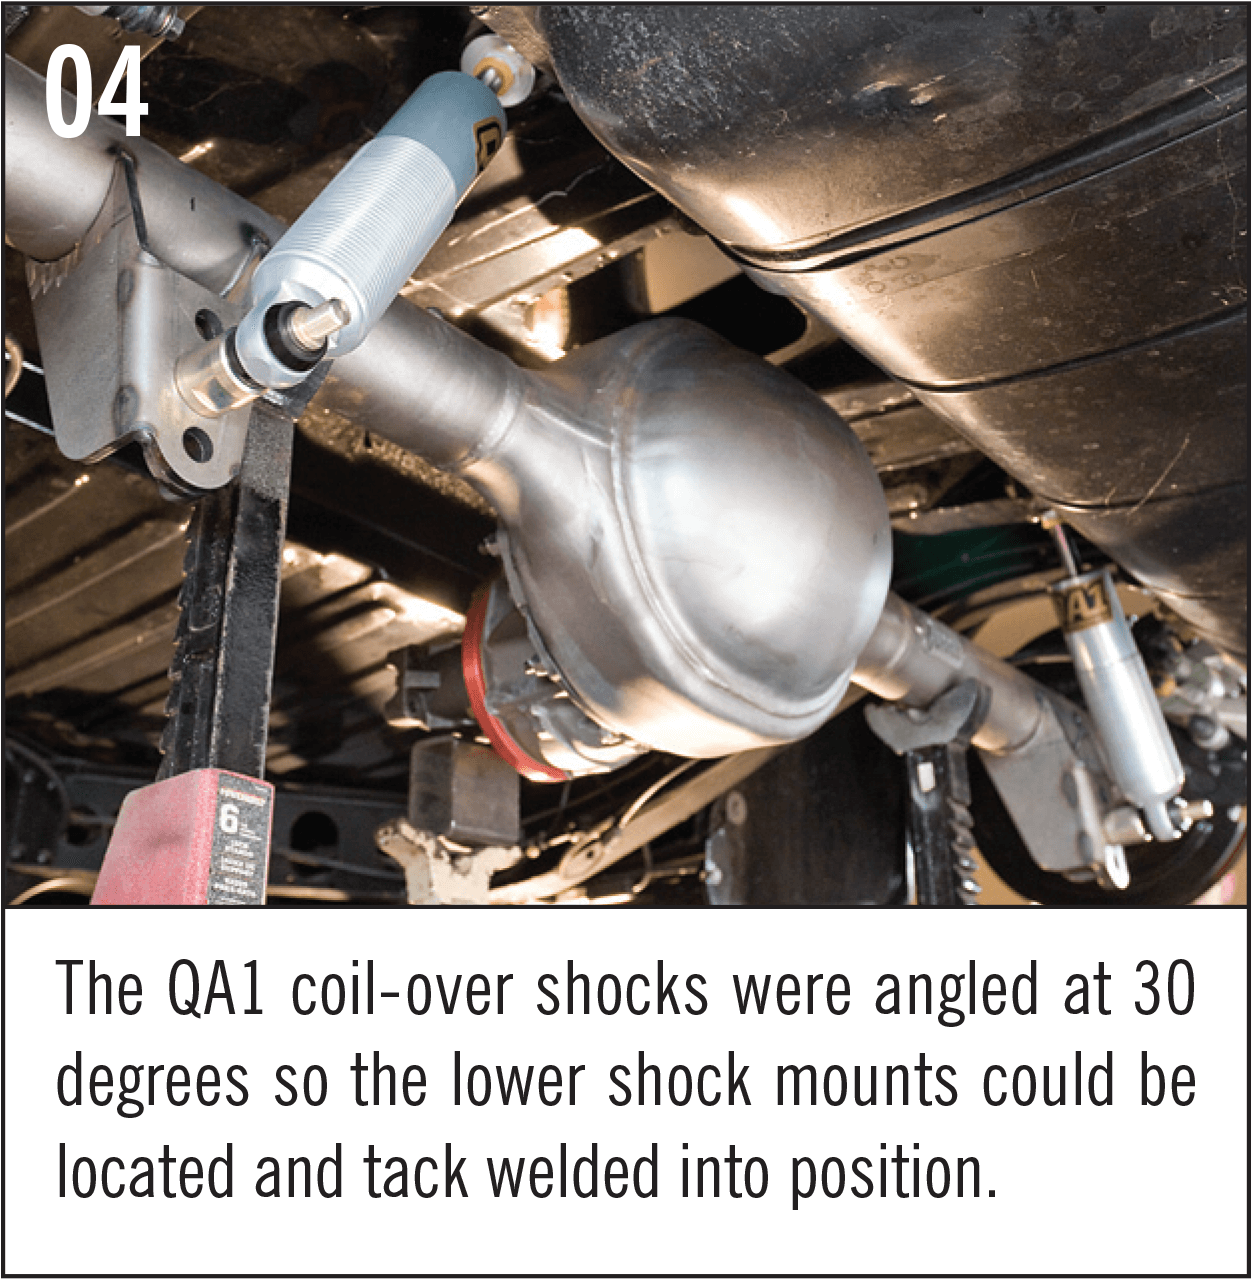
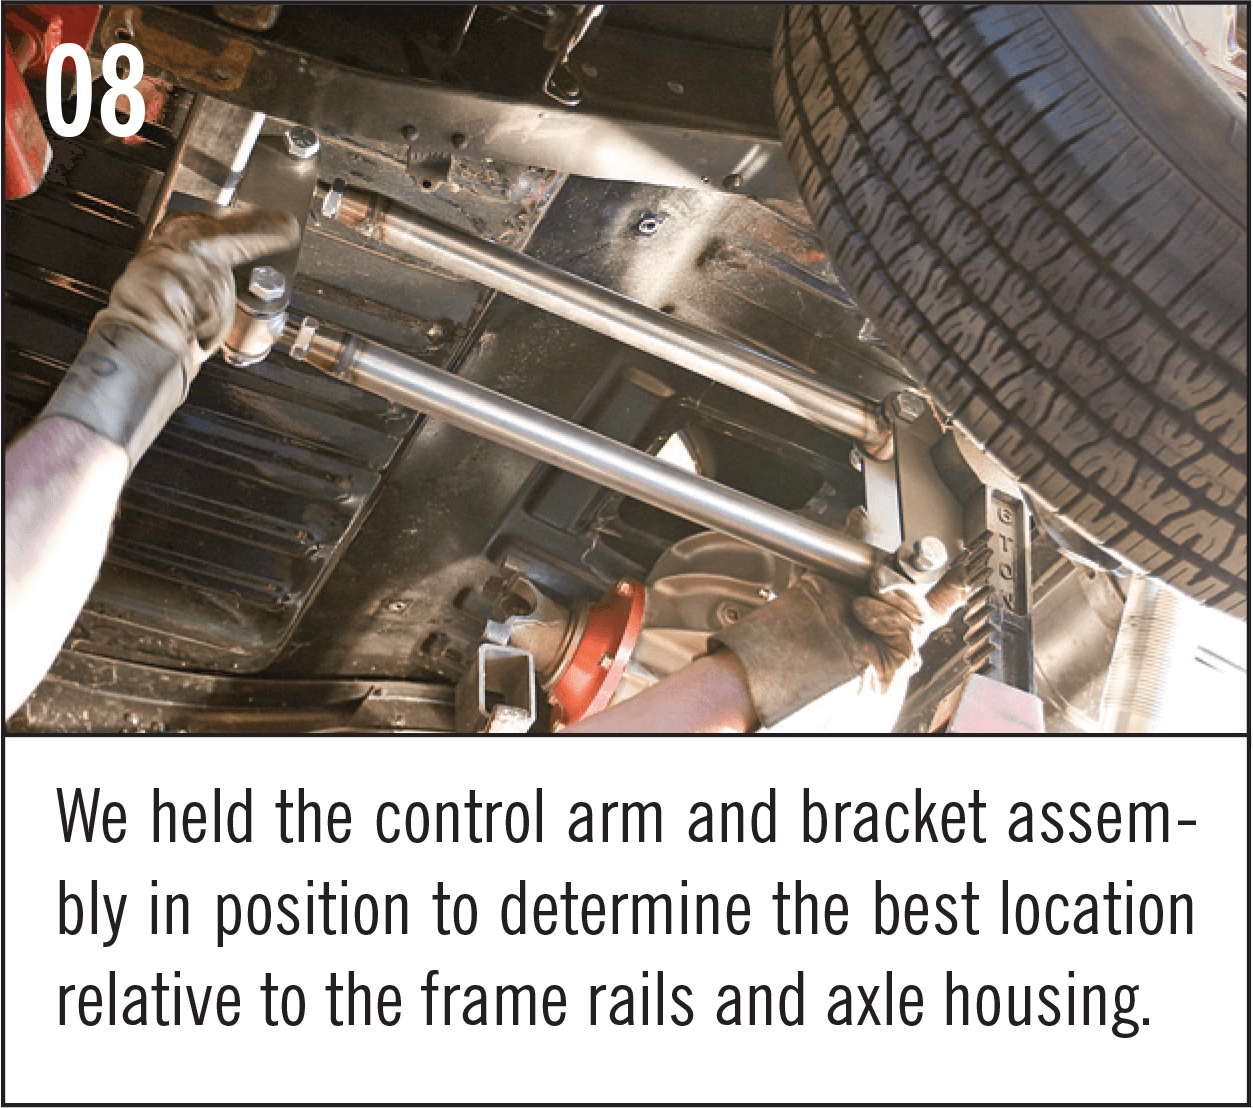
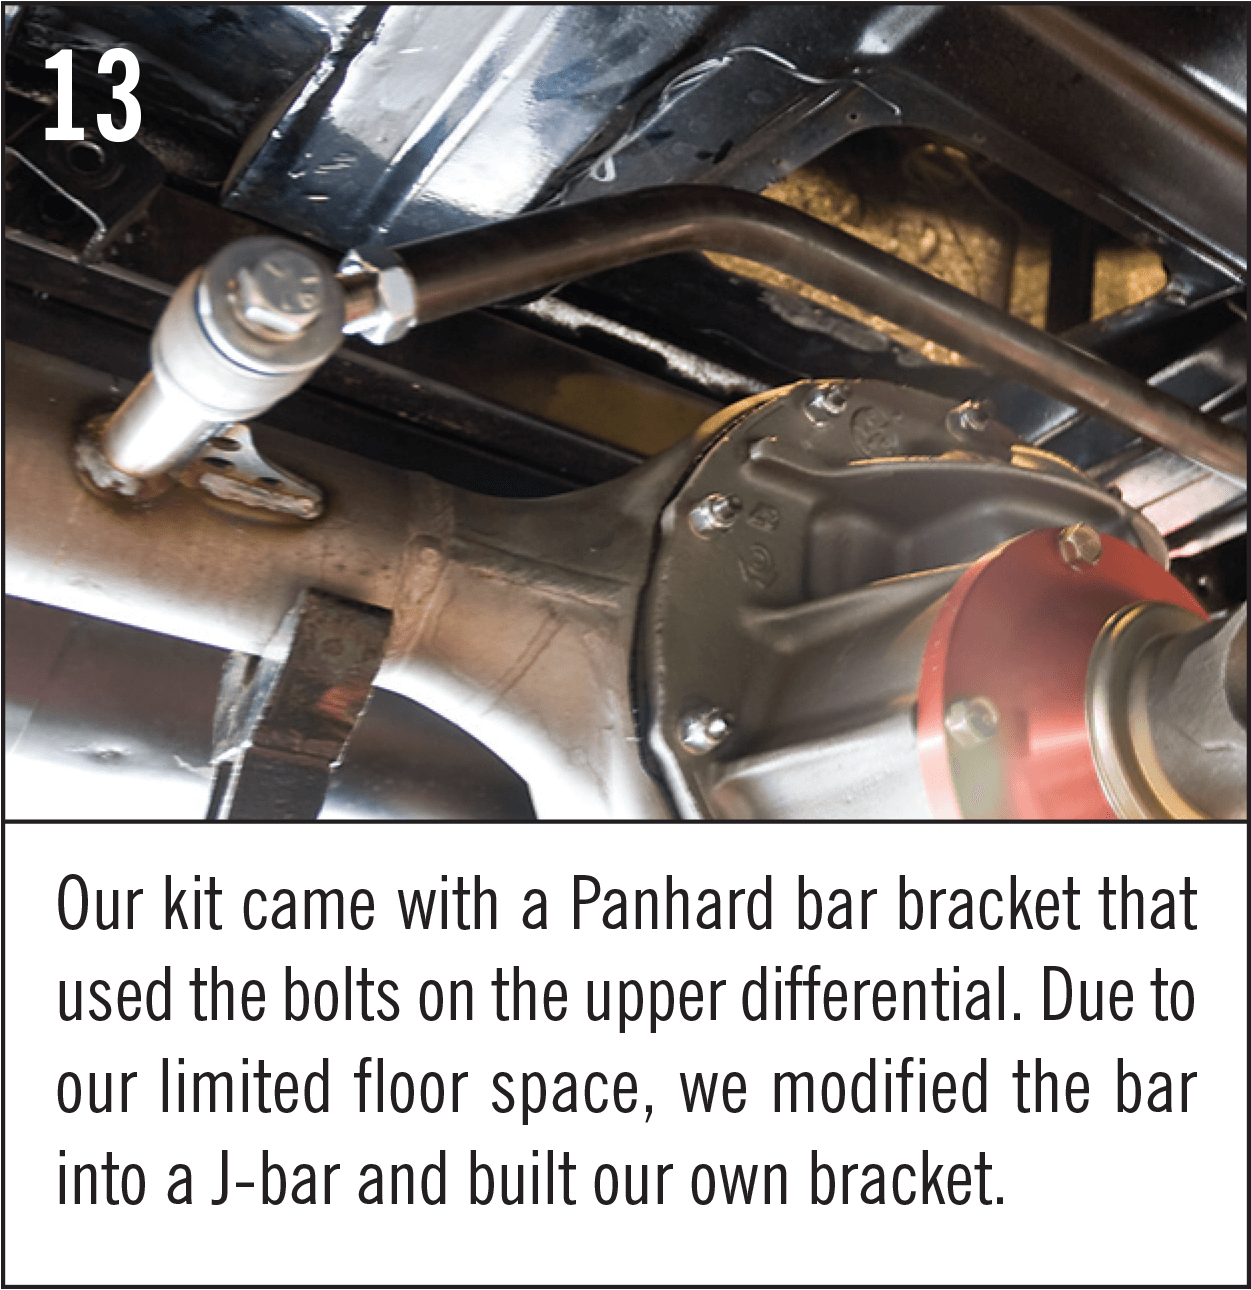
The parallel four-bar systems do require an additional Panhard bar to firmly locate the rear suspension side-to-side, but offer greater clearance for exhaust. This system maintains the same pinion angle throughout its full travel and is strongly recommended for lowered and air-suspended cars and trucks. The installation for these systems is fairly straightforward and was right on target for our project.
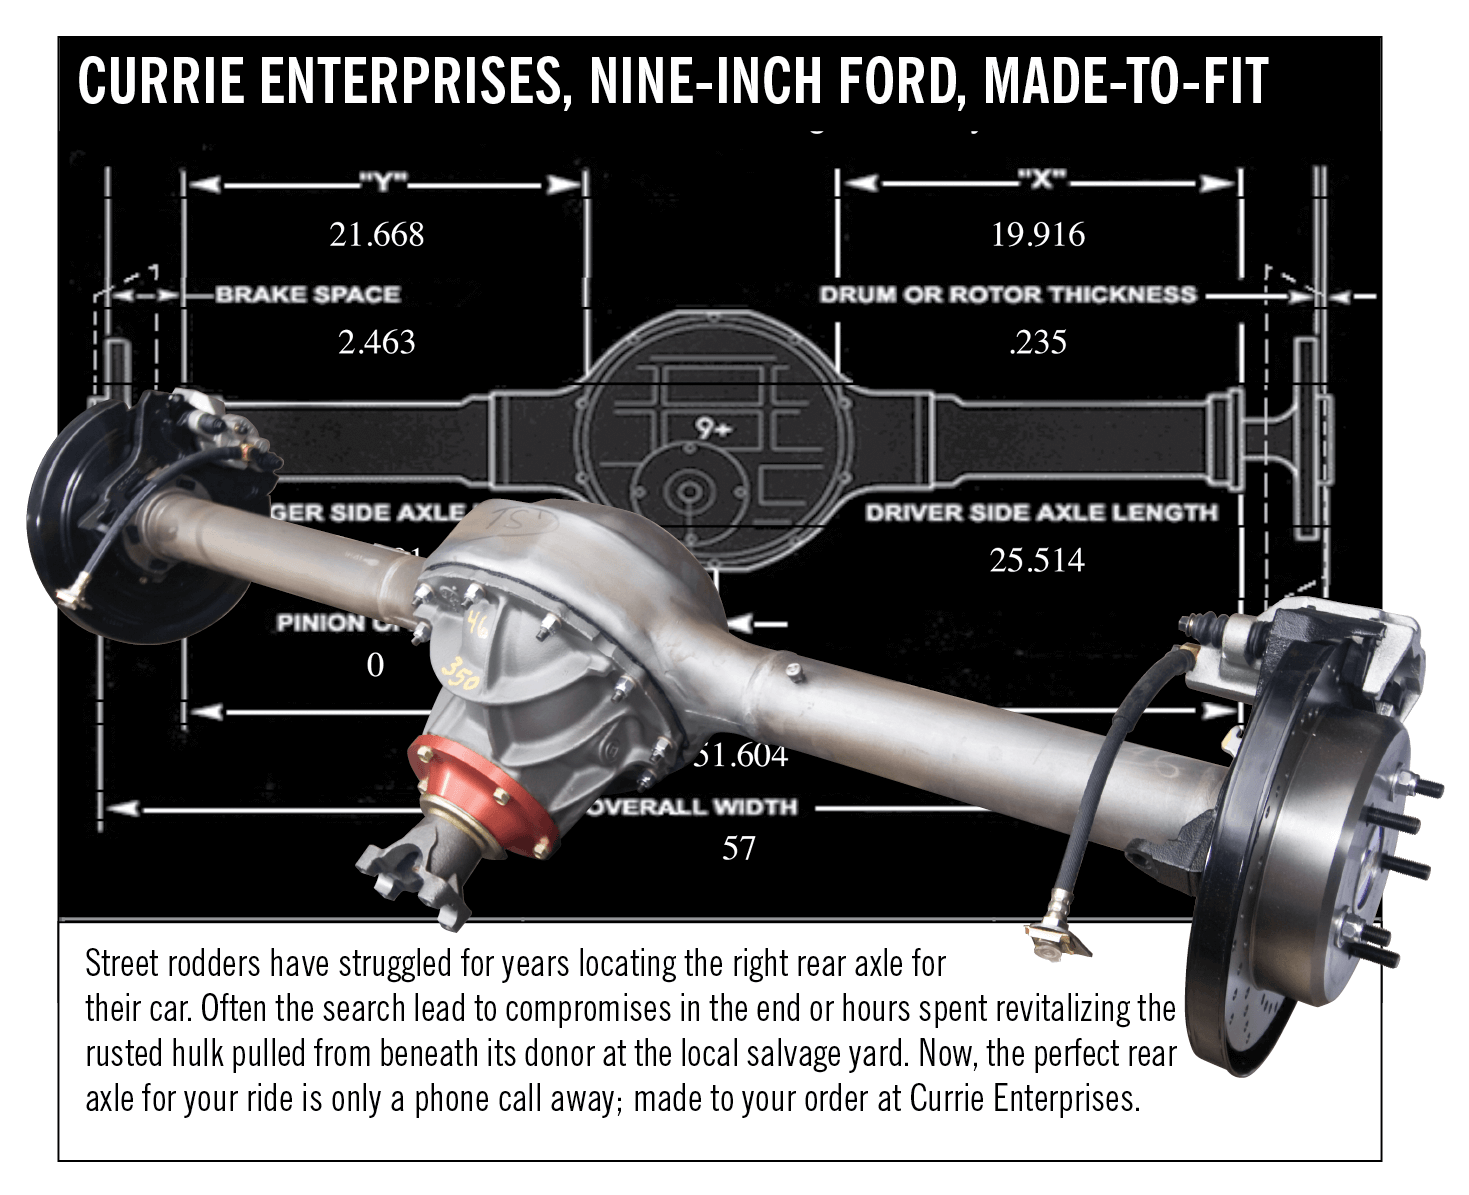
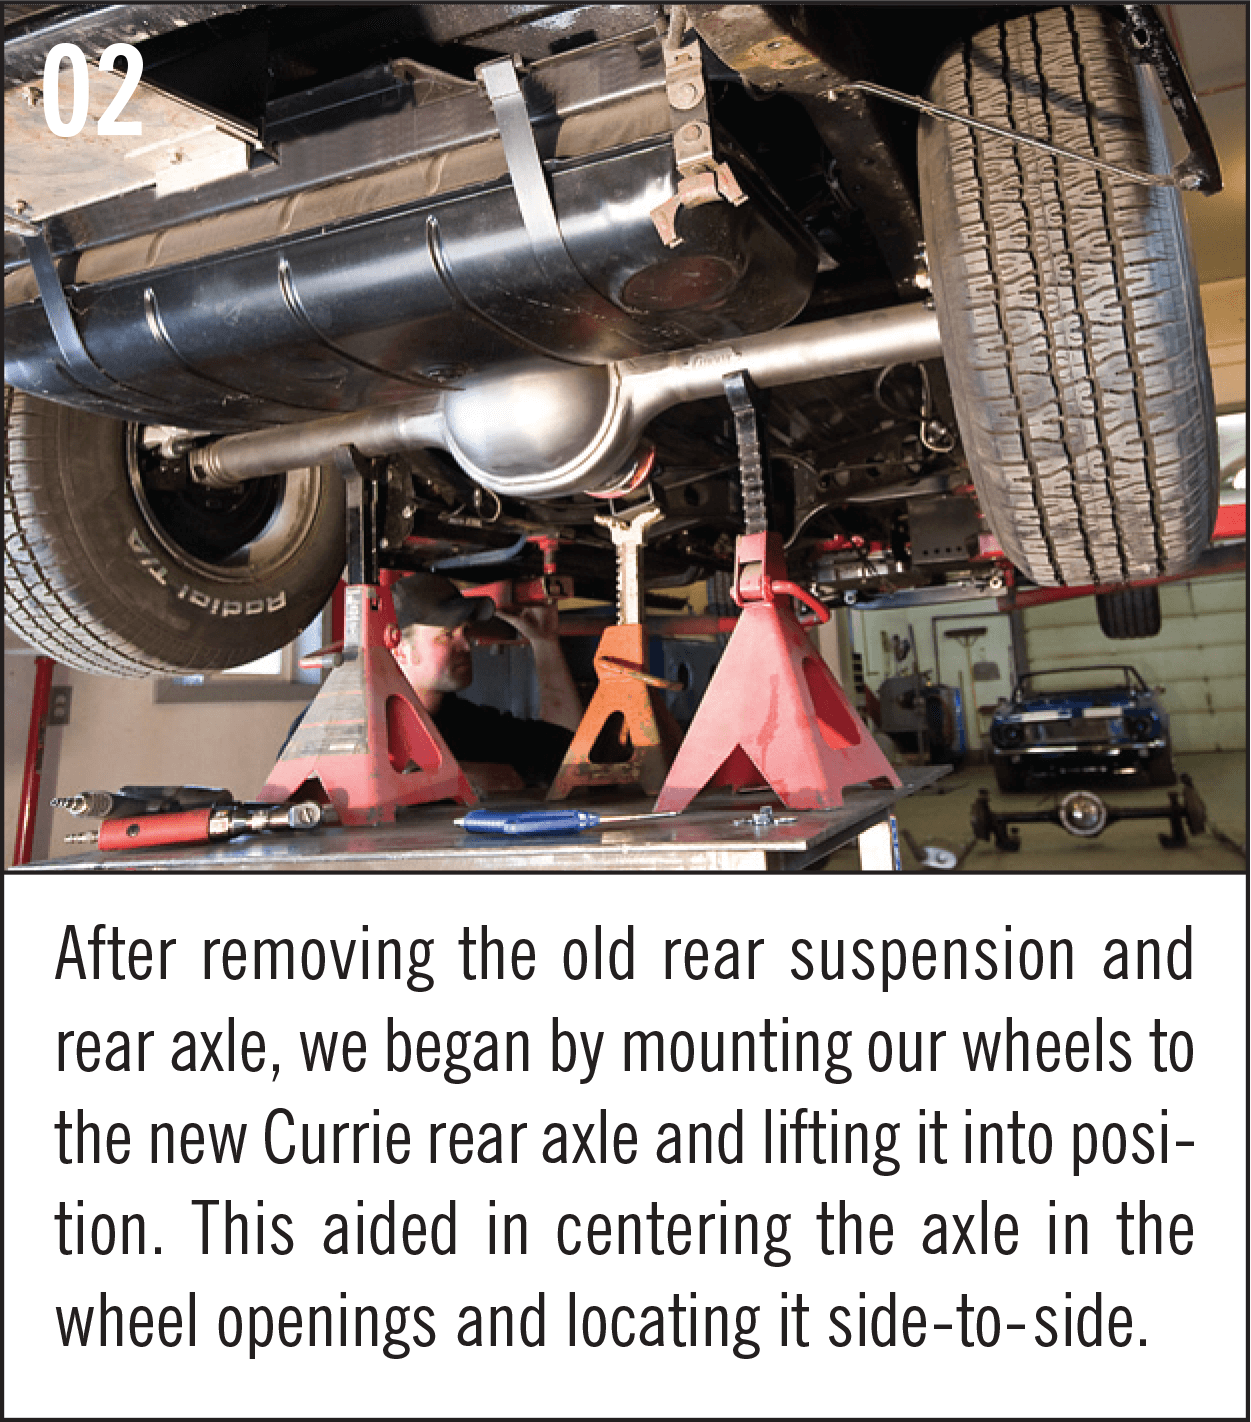
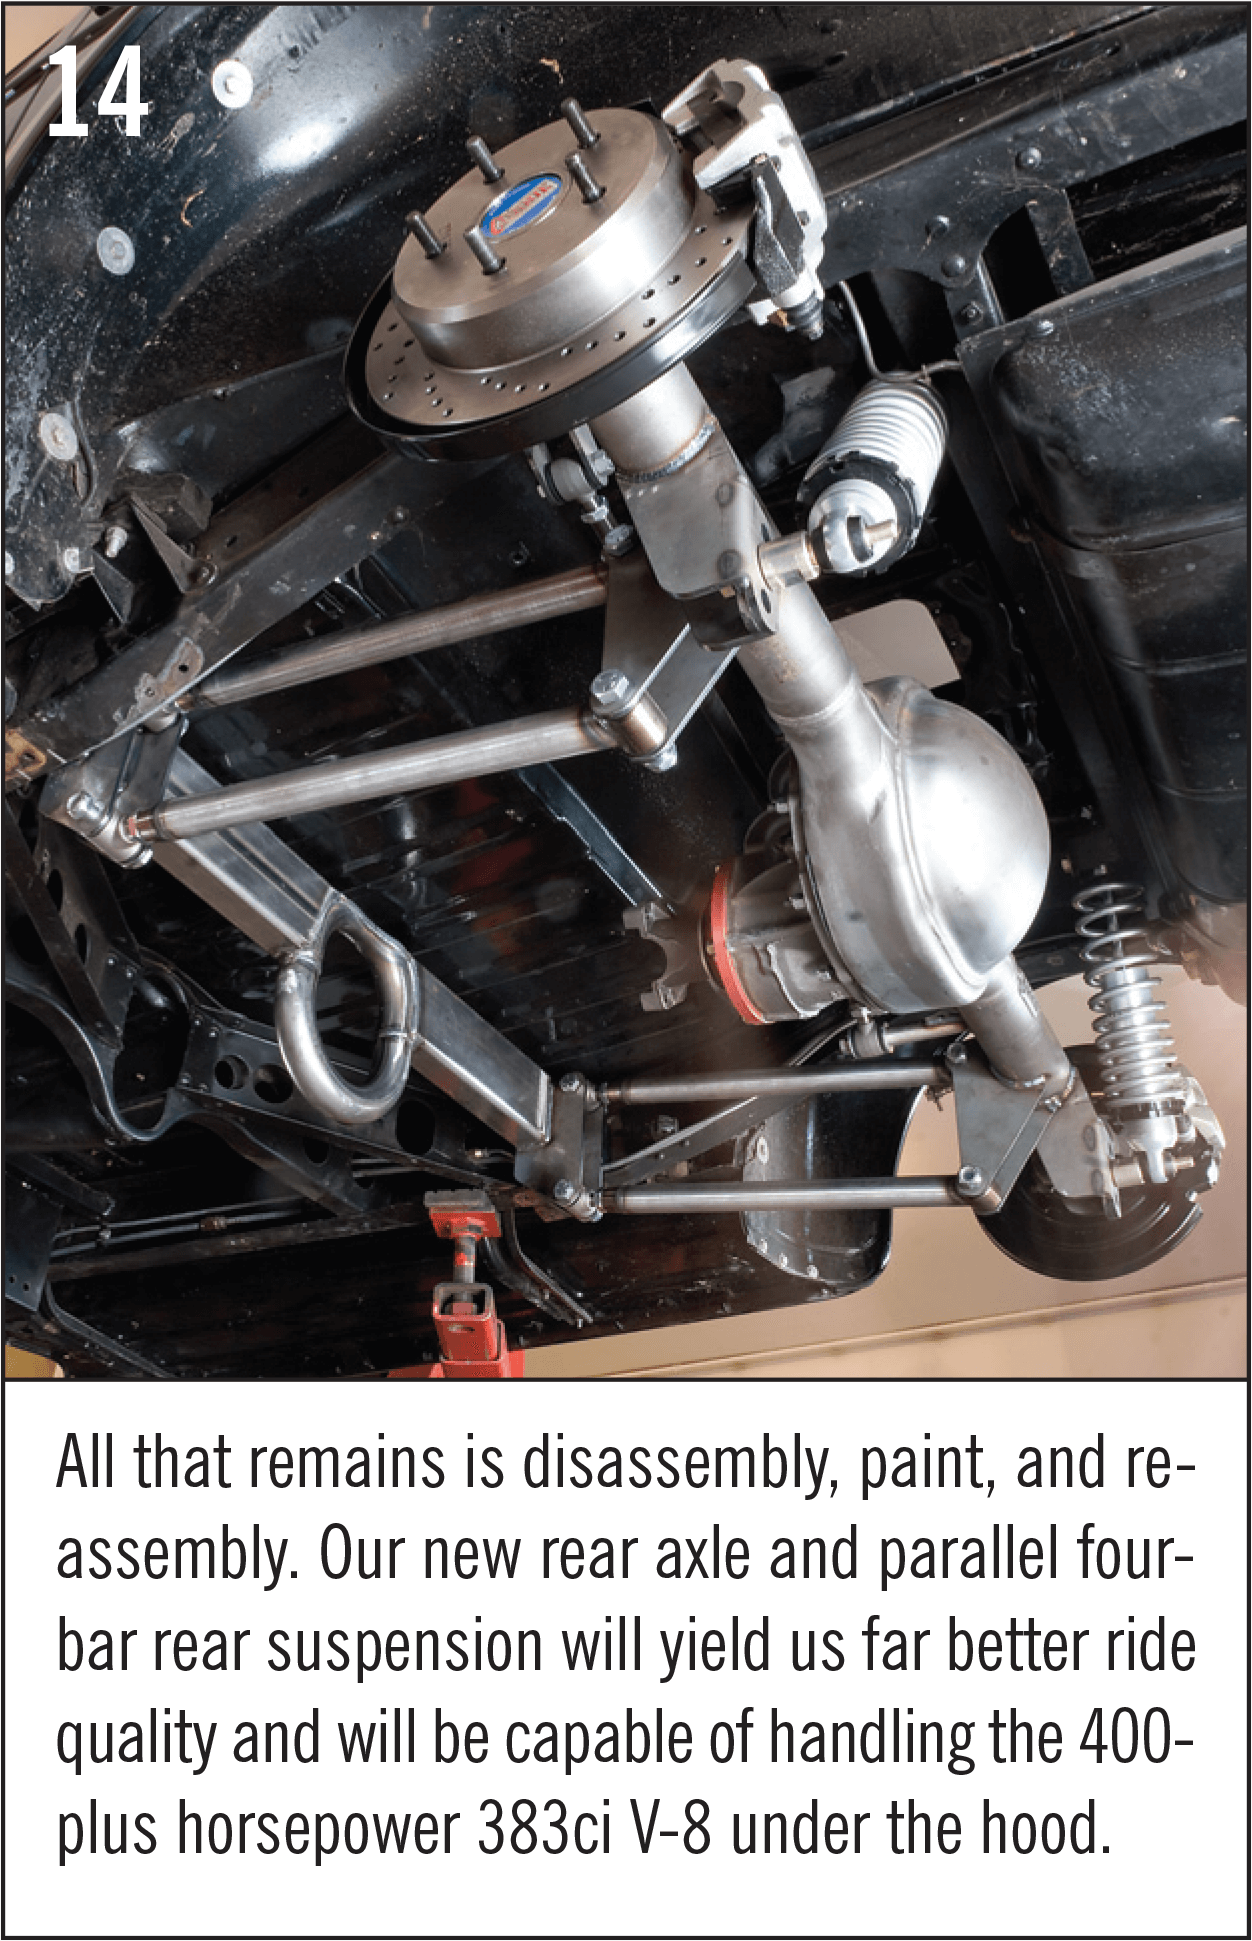
Upgrading the rear axle brought back memories of searching junkyards, swap meets, and local classifieds for a rear axle that would fit beneath the car with the wheels I wanted. It always seemed that compromises had to be made simply to make it work. Thankfully, those days are long gone, and ordering a custom-made nine-inch Ford rear axle with Explorer disc brakes and a 3.50:1 Positraction differential that perfectly fits our application is a painless process, thanks to the folks at Currie Enterprises. The quality of their rear-end assemblies and seemingly limitless options made this an easy choice for our new system.
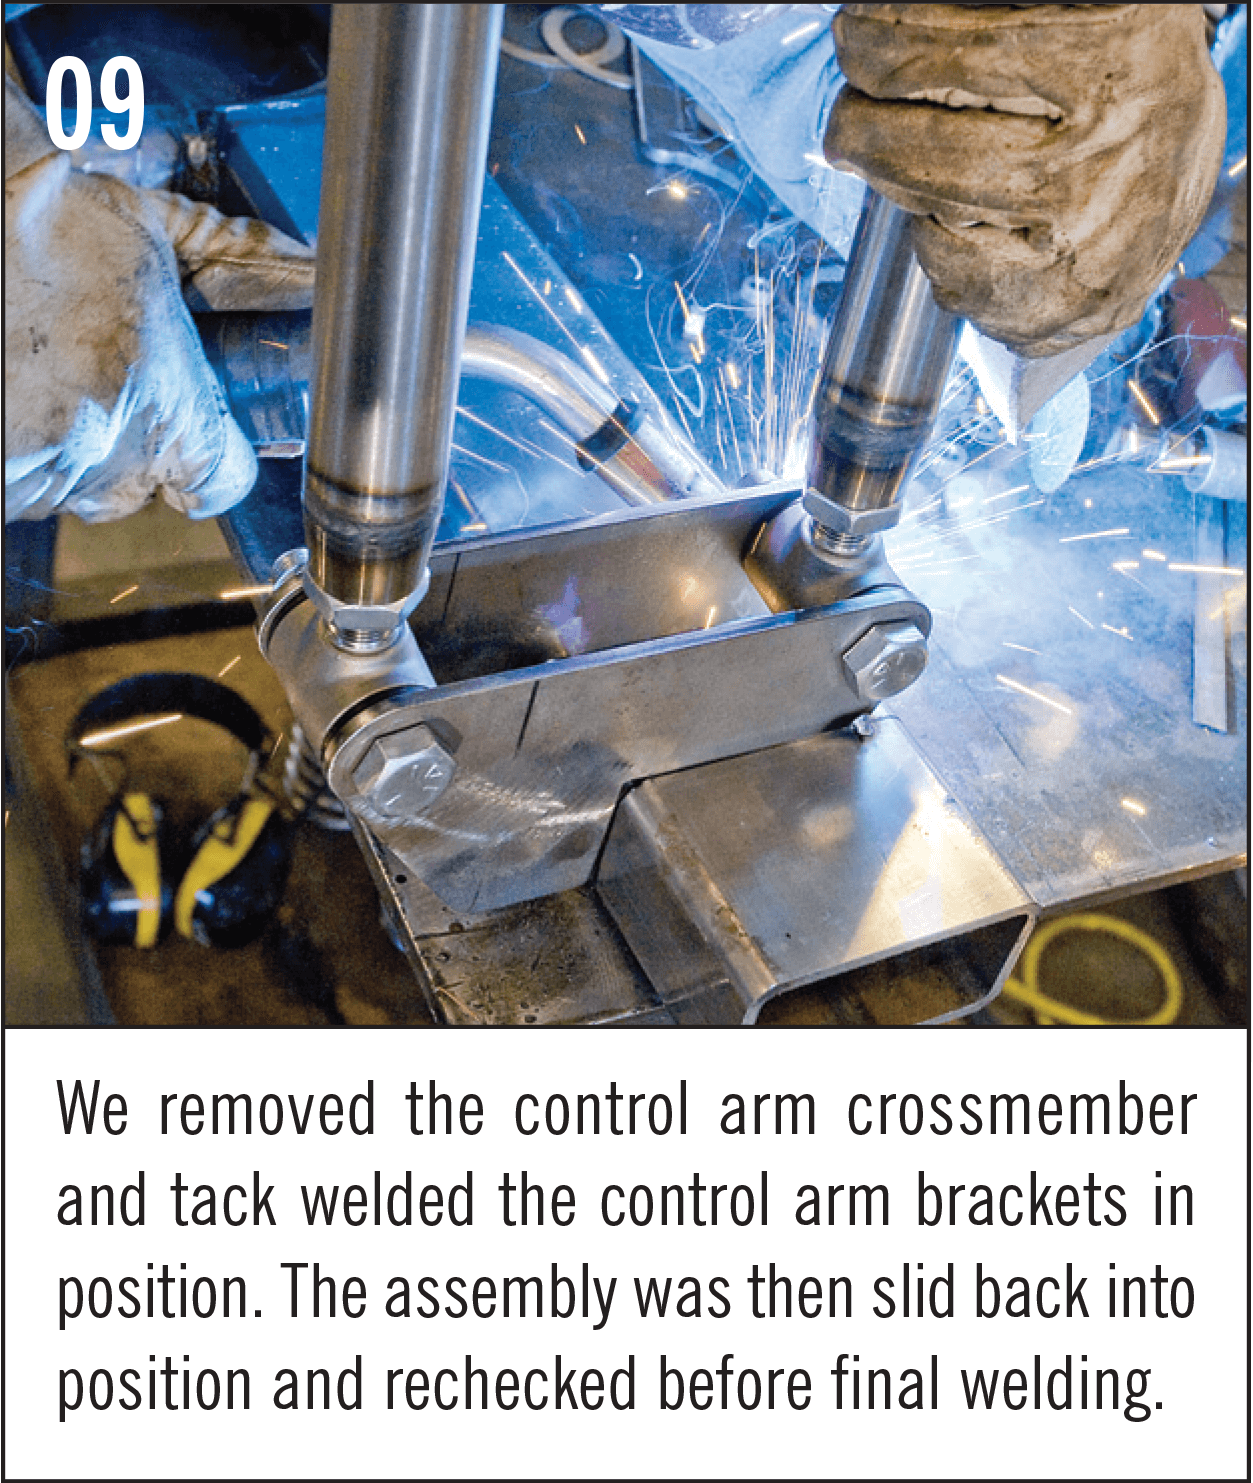
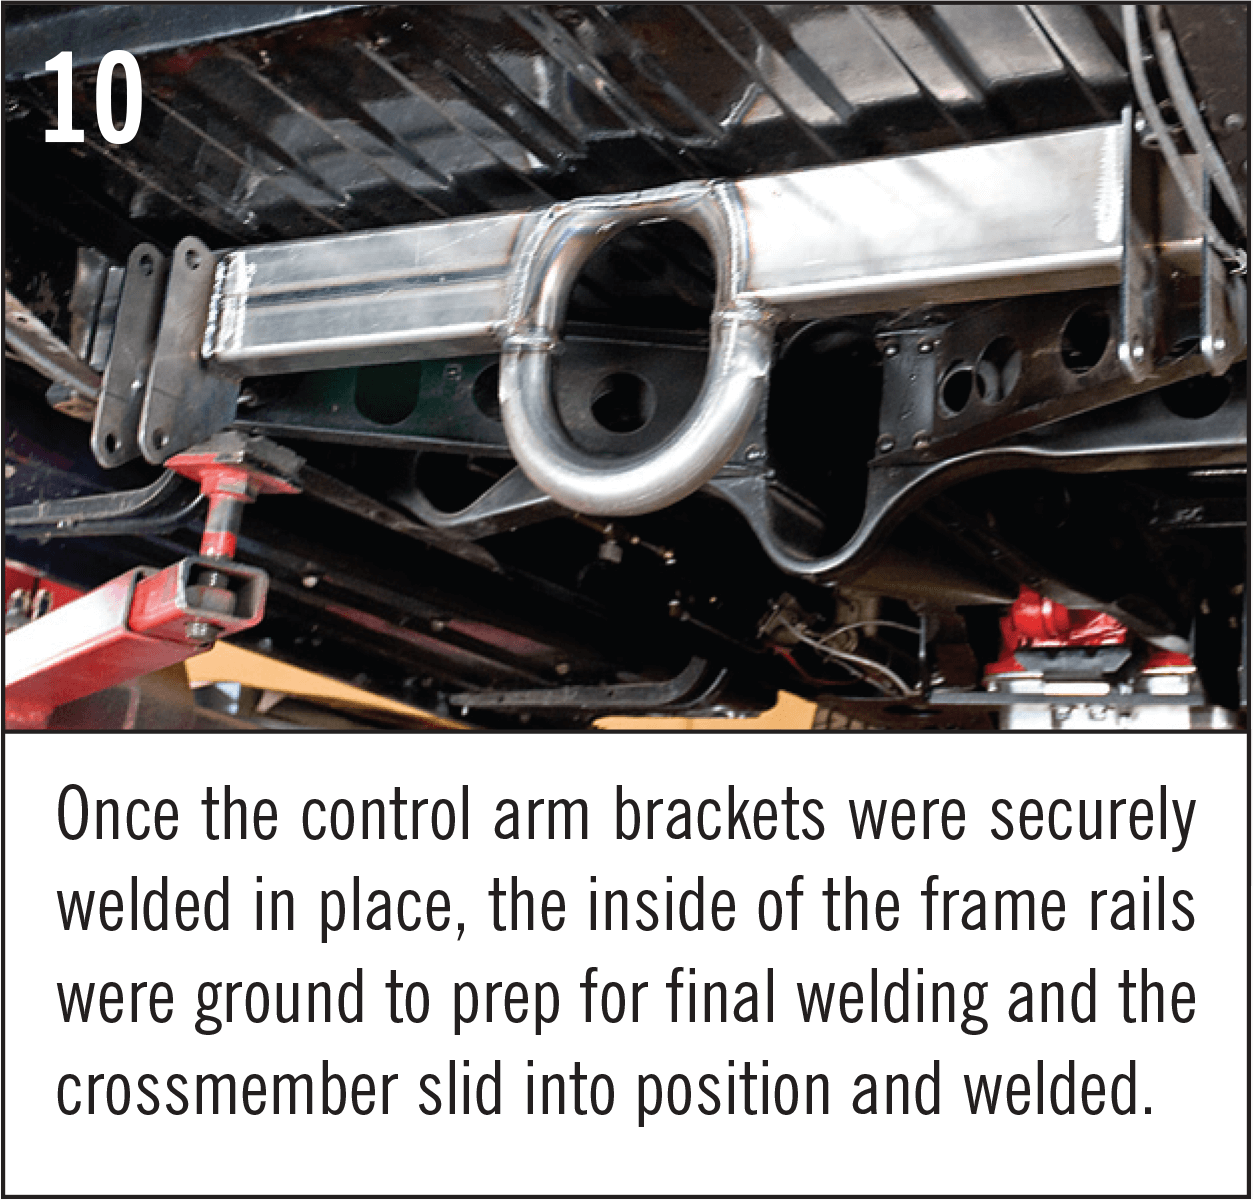
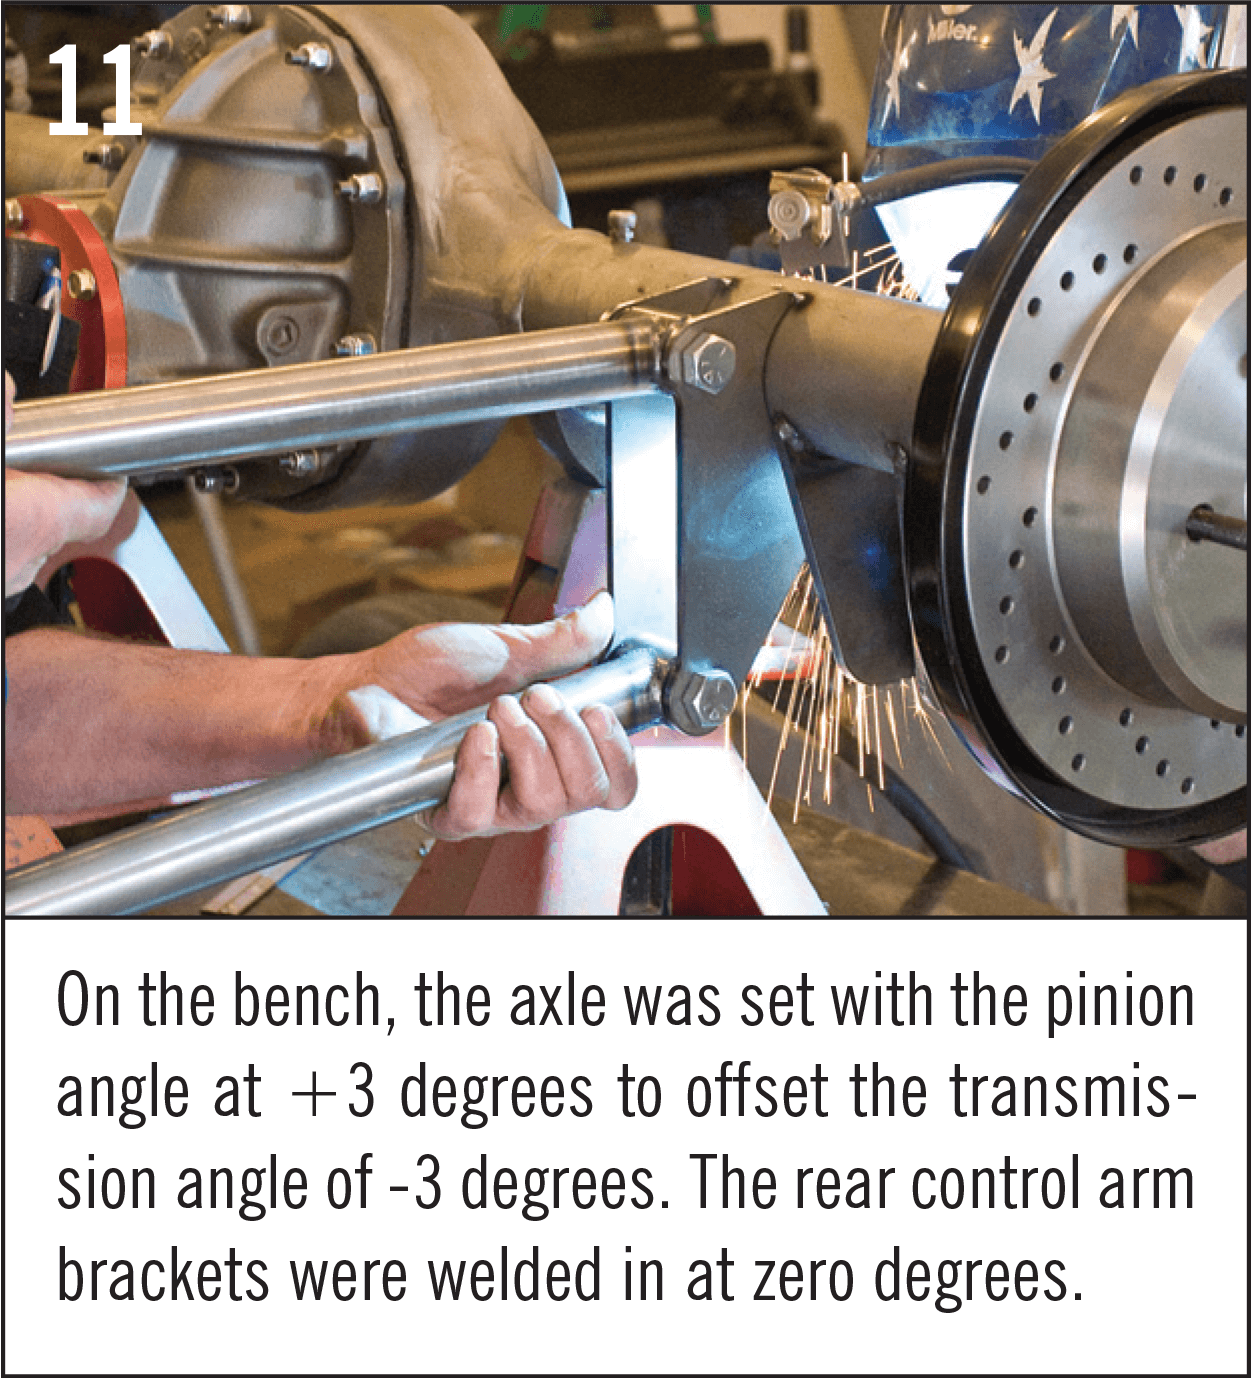
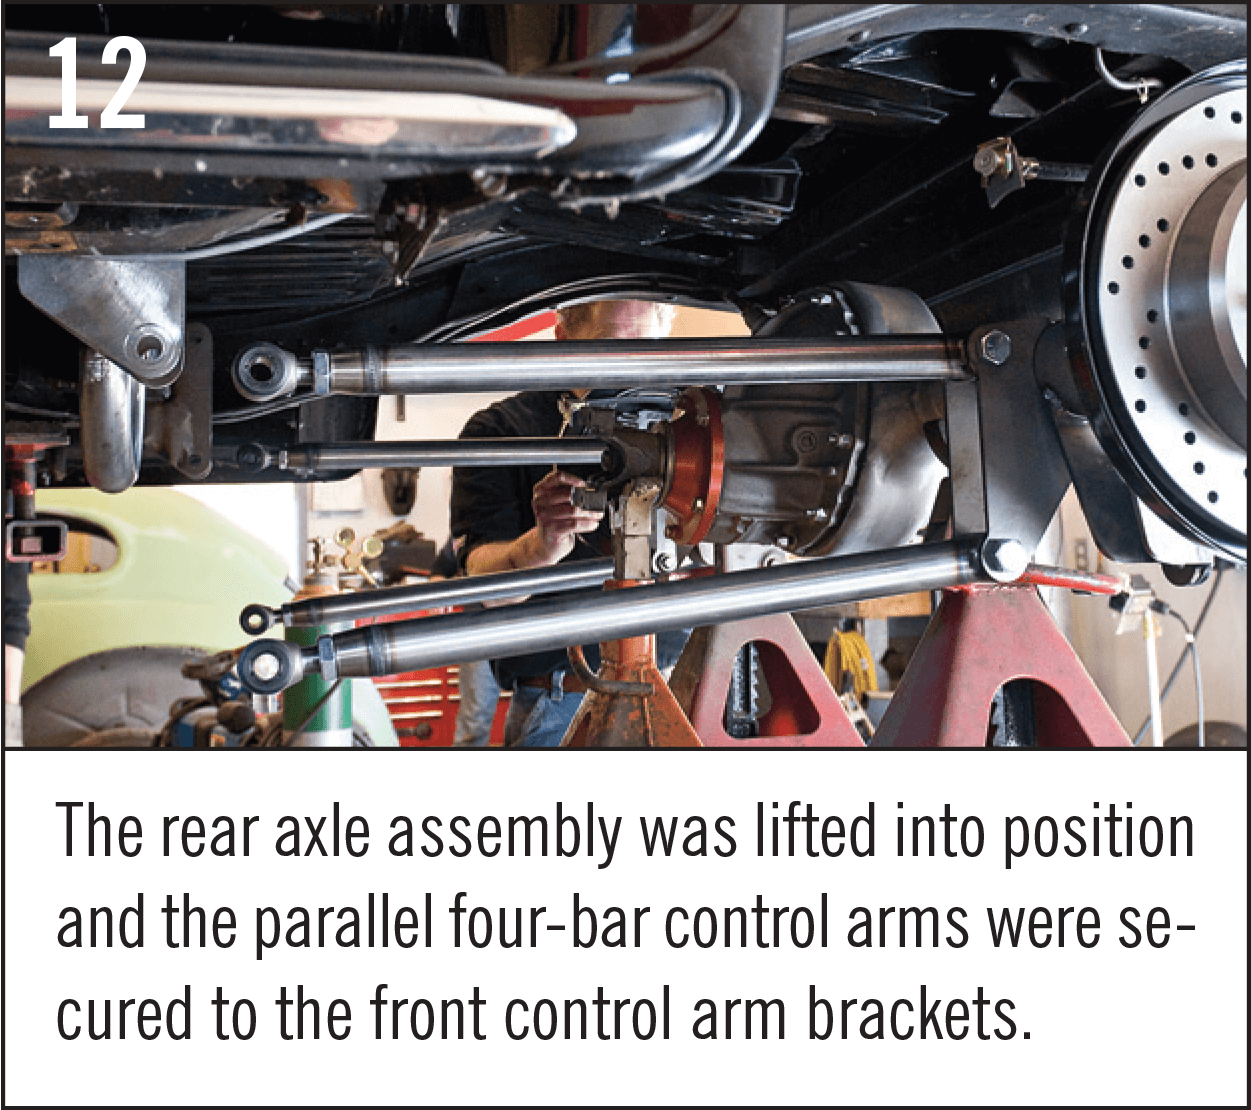
Follow along as I share some of the insights I gained on this project and put my ’35 Chevy back on the road.
I have a 1961 Pontiac Ventura 2DR HDT and would like to know how to tighten up my suspension as after parts for this car are hard to come by.
Your photos are very interesting, you talk about cars in the 30s and 40s, I have a 1942 Chevy suburban, it has knee action shocks , that are now 80 years old, nowhere in your photos do you show those shocks or the conversion, very interesting
I`d like to see the costs involved.A lot of us are on a budget.Also was the Foird 9 inch really nessecary & couldn`t you have used a Currie or Strange 12 bolt? Since the first pair of shocks weren`t the best for your application did you get a refund or an exchange ?
Great photos and article. I have 56 Nomad. I will install the AME center rail kit. I would like to use the original fuel tank. Is it possible to add a crossbar to mount the shocks for a four-link set-up. Or will the bar interfere with the fuel tank. I don't want to cut our the spare tire bin. Thanks
Excellent article! This is how we need to see it. The engineering is explained very well and the custom work is shown in detail. For many it is something new and understanding is key to considering such a task. I have a 35 Chev myself. Fantastic work on this article. How about a picture of the ride height completed? We would love to see your 35. Also, how did it work out? Any tweaks later? What front end do you have in the car?
Great write-up. I especially liked the technical drawings and installation pictures. Well done
I M restoring a 1964 Chevy impala super sport convertible I want to take the sway out of the front and rear suspensions I'm looking for some guidance or just a daily street driver. What do you recommend to accomplish this modest change uses I am restoring a 1964 Chevy impala super sport convertible. The goal is to take the sway out of the front and rear suspensions. What would your recommendation be to accomplish this modest improvement
What would the cost of a4 bar rear suspension cost